Car Accessories
Car Battery Replacement Cost: Best Prices & Tips
Many drivers don’t consider the cost of replacing their car’s battery until their vehicle abruptly stops starting. One morning, everything is operating smoothly, and the next, your engine is either entirely dead or making a clicking sound. Most people are unprepared for both the failure and the expense of replacing a car battery because they deteriorate over time.
A car battery has an average lifespan of three to five years, but it can be shortened or extended by a number of factors, including driving behavior, weather, vehicle electronics, and battery quality. Depending on whether you drive a modest sedan, SUV, luxury car, or hybrid, the cost can differ significantly when replacement becomes necessary. The location of the installation is also important because replacing a battery at a dealership is frequently far more expensive than purchasing one from an auto parts store or doing it yourself.
Knowing the actual cost of replacing your car’s battery lowers the chance of malfunctions at inconvenient times and helps you avoid overspending. Additionally, it enables you to select the appropriate battery type, compare possibilities, and benefit from warranties or free installation deals.
The average cost of replacing an automobile battery, the variables that affect pricing, the variations in battery types, and useful money-saving advice are all covered in this article. This article will assist you in making a wise and economical choice, regardless of whether you’re preparing ahead of time or are already dealing with a dead battery.

What Is the Average Car Battery Replacement Cost?
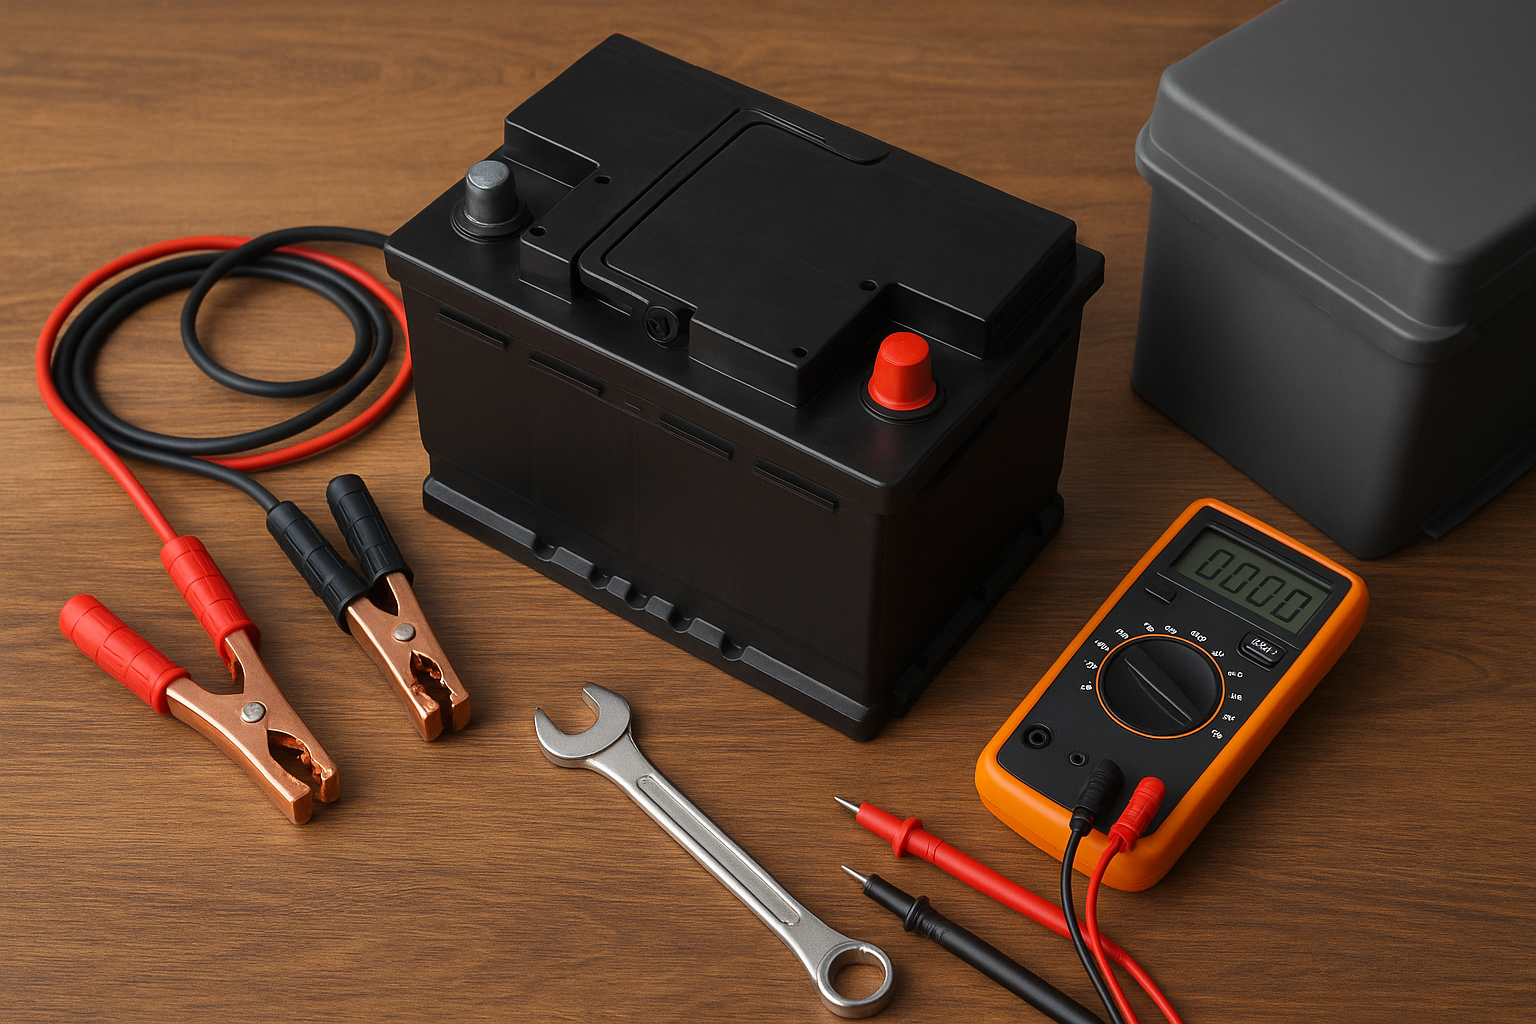
The normal cost of replacing an automobile battery ranges from $75 to $300, depending on a number of variables such the type of battery, the size of the vehicle, and the location of the repair. The whole cost, including the battery and installation, often ranges from $120 to $200 for the majority of drivers with regular gasoline or diesel cars.
Battery replacement expenses can quickly increase for larger vehicles, premium cars, or models with sophisticated electronic systems, even if this may seem like a simple repair in comparison to major engine or transmission maintenance.
Average Cost Breakdown
The cost of the battery itself plus the labor required to install it typically make up the entire replacement cost.
-
Economy batteries: $60 – $100
-
Mid-range batteries: $100 – $180
-
Premium or AGM batteries: $180 – $300+
-
Installation/labor: $20 – $100
When you buy a battery from them, several auto parts merchants provide free installation, which can drastically lower the total cost. However, because of diagnostic tests and electrical system resets, dealerships and specialist service facilities frequently charge greater labor costs.
Cost With Installation vs Battery Only
-
Battery only (DIY replacement):
Depending on the type of battery, replacing it yourself usually costs between $60 and $200. This choice works well for older cars with readily available batteries and little electronic needs. -
Battery with professional installation:
The price often rises by $20 to $100 when installation is included. For newer cars with difficult-to-reach battery locations, computer resets, or battery registration, professional installation is advised.
Average Cost by Vehicle Type
-
Small cars & sedans: $75 – $180
-
SUVs & pickup trucks: $120 – $250
-
Luxury vehicles: $200 – $400+
-
Hybrid vehicles (high-voltage battery): $1,000 – $3,500+
Selecting the right battery for your car will assist avoid premature failure and needless replacement costs, even though the initial cost can vary. When the time comes, you may choose the most economical alternative with confidence if you are aware of the average cost of replacing your car’s battery.
Read also:Best Car Vacuum Cleaners (Tested & Reviewed)
AGM Battery Replacement Cost
More sophisticated AGM (Absorbent Glass Mat) batteries are frequently needed for cars with enhanced safety features, start-stop systems, and increased electrical requirements.
The average cost of an AGM battery is between $150 and $300, and when installation is taken into account, the total cost of replacement might approach $200 to $350. Although AGM batteries perform better and last longer than conventional lead-acid batteries, they are more costly and shouldn’t be swapped out for regular batteries unless the car manufacturer permits it.
Lithium-Ion Battery Replacement Cost
Because of their complexity and large energy capacity, lithium-ion batteries—which are primarily utilized in hybrid and electric vehicles—are much more costly.
Depending on the type of car and battery capacity, replacement expenses might range from $1,000 to $3,500 or more. Despite their high cost, these batteries are made to last far longer than traditional automobile batteries and frequently have lengthy guarantees, sometimes lasting up to 8 or 10 years.
Which Battery Type Offers the Best Value?
For the majority of drivers, the requirements of the vehicle—rather than just price—determine the best value. Reduced battery life and electrical issues can result from using a less expensive battery than is advised. Despite their higher initial costs, AGM and lithium-ion batteries frequently offer superior long-term dependability, performance, and durability.
Selecting the right battery type guarantees peak performance and helps avoid early failure, saving you money over time on recurring replacements.
Types of Car Batteries and Their Pros and Cons
The performance, dependability, and longevity of your car depend heavily on the battery you choose. The technology, cost, and upkeep needs of automobile batteries vary. The primary automobile battery types, together with their benefits and drawbacks, are broken down in detail below.
Lead-Acid Batteries

The most popular and conventional kind of batteries are lead-acid ones, which are frequently found in older and entry-level vehicles. They produce electricity using a liquid electrolyte.
Pros:
-
Affordable and widely available
-
Simple design, easy to install and replace
-
Reliable for standard vehicles without advanced electronics
Cons:
-
Shorter lifespan (typically 3–4 years)
-
More maintenance required (checking water levels in some types)
-
Less efficient in extreme temperatures
-
Prone to leakage and corrosion
Best for:
Budget-conscious drivers and older vehicles with standard electrical systems.
Check Current Deals On Amazon Before Prices Change
AGM (Absorbent Glass Mat) Batteries

AGM batteries are more durable and spill-proof because they use a fiberglass mat to absorb the electrolyte. They are made for cars that have large electronic loads or start-stop systems.
Pros:
-
Longer lifespan than traditional lead-acid batteries (4–6 years or more)
-
Better performance in extreme temperatures
-
Maintenance-free and spill-proof
-
Handles deep discharges better
Cons:
-
Higher upfront cost than lead-acid batteries
-
Requires proper charging to avoid damage
-
Replacement must match manufacturer specifications
Best for:
Modern vehicles with advanced electronics, start-stop systems, or high electrical demands.
Check Current Deals On Amazon Before Prices Change
Gel Batteries

Instead of using liquid, gel batteries employ a silica-based gel electrolyte. They are resistant to leaks and vibration because to this design.
Pros:
-
Maintenance-free and leak-proof
-
Resistant to vibration, ideal for off-road or marine vehicles
-
Long lifespan when properly maintained
Cons:
-
More expensive than lead-acid batteries
-
Sensitive to overcharging, requiring specialized chargers
-
Slower to recharge than AGM or lead-acid batteries
Best for:
Off-road vehicles, motorcycles, or applications where durability is critical.
Check Current Deals On Amazon Before Prices Change
Lithium-Ion Batteries

Electric and hybrid cars are the main applications for lithium-ion batteries. They have a high energy density and are lightweight.
Pros:
-
Very long lifespan (8–10 years or more)
-
Lightweight and compact
-
High energy efficiency and faster charging
-
Low maintenance
Cons:
-
Extremely high upfront cost ($1,000–$3,500+)
-
Requires specialized handling and installation
-
Replacement is complex and often limited to dealerships
Best for:
Hybrid and electric vehicles or luxury cars with advanced energy systems.
Check Current Deals On Amazon Before Prices Change
How Long Does a Car Battery Last?
You may prepare ahead of time and prevent unplanned malfunctions by knowing how long an automobile battery lasts. The majority of car batteries deteriorate gradually over time rather than abruptly failing, though battery life varies by vehicle and usage. You can replace the battery before it leaves you stranded by being aware of its typical lifespan and warning indicators.
Average Car Battery Lifespan
Under typical driving circumstances, a regular car battery typically lasts three to five years. Regularly used and well-maintained vehicles typically stay in this range. Extreme weather, however, may cause batteries to fail more quickly. While cold weather increases the power required to start the engine, stressing an already weakened battery, hot weather speeds up chemical reactions inside the battery, resulting in accelerated wear.
Another factor is the type of battery. Because of their superior vibration tolerance and deeper depletion cycles, AGM batteries frequently have longer lifespans than traditional lead-acid batteries, which typically have shorter lifespans.
Driving Habits and Battery Life
Short, frequent travels can drastically reduce the battery’s lifespan by preventing it from fully recharging. The battery is also depleted more quickly when devices like lighting and infotainment systems are left on while the engine is off. On the other hand, regular longer drives enable the alternator to adequately recharge the battery and increase its lifespan.
Signs Your Car Battery Needs Replacement
Several warning signs indicate a failing battery:
-
Slow or delayed engine cranking
-
Dim headlights or flickering interior lights
-
Battery or check-engine warning light on the dashboard
-
Electrical issues such as power window or radio malfunctions
-
Visible corrosion on battery terminals
It is advisable to test or replace your battery if you observe these symptoms and it is getting close to three years old. You can avoid unforeseen car battery replacement expenditures and emergency towing costs by replacing your batteries in advance.
Can You Reduce Car Battery Replacement Cost?
Although replacing an automobile battery might be expensive, there are a number of ways to prolong battery life and reduce costs when replacement is required. You may drastically save total expenses by knowing how to take care of your batteries and shopping sensibly.
Tips to Extend Battery Life
-
Drive Regularly and for Sufficient Duration
Short trips damage the battery over time by preventing the alternator from completely charging it. Maintaining a healthy charge requires driving your automobile for at least 20 to 30 minutes at a time. -
Keep the Battery Clean and Corrosion-Free
Corrosion and dirt on battery terminals can lead to early failure and lower efficiency. Examine and clean the terminals on a regular basis using a commercial battery cleaner or a solution of baking soda and water. -
Avoid Deep Discharges
The battery’s lifespan is shortened when it is frequently entirely depleted, such as when lights or electronics are left on while the engine is off. Before you turn off the car, turn off all of its accessories. -
Maintain Optimal Temperature
Battery performance may be impacted by extreme heat or cold. To protect your battery, park in insulated garages in the winter and in shady regions in the summer. -
Check Electrical Systems
Battery life may be shortened by malfunctioning alternators or parasitic drains, which are electrical parts that take power while the vehicle is not in use. Unexpected failures are avoided by routine inspections.
How to Save Money on Battery Replacement
-
Compare Prices Online and In-Store
Batteries are frequently more affordable online than at local stores. When comparing, don’t forget to account for delivery and installation expenses. -
Look for Warranties and Rebates
A lot of batteries have warranties that last between two and five years. Rebates are available from certain manufacturers or dealers, which can lower the initial cost. -
Choose the Right Battery Type
Avoid overspending on a battery that is larger than what your car needs. To save money, adhere to the manufacturer’s guidelines. -
Consider Professional Installation at Auto Shops
Installation costs may be more expensive at dealerships. For a fraction of the price, local vehicle repair shops or mechanics can install the battery while guaranteeing correct setup.
By using these suggestions, you may extend the life of your battery, prevent premature replacement, and make sure that, when it is time to replace it, you do so at the most affordable price without compromising dependability or performance.
Is Car Battery Replacement Covered by Warranty or Insurance?
Although replacing an automobile battery might be expensive, warranties or insurance may sometimes cover all or part of the cost. You can save money and feel more at ease if you know what is covered and under what circumstances.
Manufacturer Battery Warranty
The majority of new cars have a manufacturer’s guarantee that covers the original battery for a predetermined amount of time, usually two to four years or 24,000 to 50,000 miles, whichever comes first. This warranty typically covers workmanship or material flaws, but it does not cover regular wear and tear or battery failure brought on by poor maintenance.
The dealership or authorized service center will typically replace your battery for little or no cost if it fails within the warranty term due to manufacturing flaws. For precise coverage information, make sure you review the terms of your car’s warranty.
Extended Vehicle Warranty
Some automobile owners buy a vehicle protection plan or extended warranty, which might cover battery replacement. Although coverage varies by plan, premature failure of expensive batteries, including AGM or hybrid vehicle batteries, is typically covered. Roadside assistance, which may include emergency battery replacements, is another feature of extended warranties.
Insurance Coverage
Regular battery replacement is usually not covered by standard auto insurance coverage. However, if the battery fails because of a covered mechanical problem, some comprehensive or mechanical breakdown coverage plans might refund expenses. It’s crucial to thoroughly review your policy and ask your provider if battery failure is covered.
Frequently Asked Questions (FAQs) About Car Battery Replacement Cost
Answering frequently asked questions gives readers useful information and helps dispel misconceptions. Here are some commonly asked questions about the expense of replacing an automobile battery.
How much does it cost to replace a car battery?
Depending on the battery type, installation, and vehicle make, the price usually falls between $75 and $300 for basic cars. Hybrid or electric vehicle batteries can cost anywhere from $1,000 to $3,500+, whereas premium or AGM batteries can be more expensive.
Can I drive with a failing car battery?
Driving with a weak or dying battery is dangerous, yet it is feasible for a brief period of time. It’s possible that the car won’t start or that the electronics won’t work. To prevent becoming stranded, it is best to replace the battery as soon as possible.
Does car battery replacement require reprogramming?
Modern cars may need to have their computer systems reprogrammed or registered in order to change their batteries, particularly European and luxury models. This guarantees the electrical system and start-stop operations operate at their best.
Why do some cars need battery registration?
The car’s computer gets informed about the new battery through battery registration. In order to guarantee correct charging and avoid battery damage, this is especially crucial for AGM and start-stop system batteries. Battery life may be shortened if registration is not completed.
Is it cheaper to replace a car battery yourself?
Labor costs can be reduced by $20 to $100 by doing the replacement yourself. It is only advised for cars with readily available batteries and few electronics, though. Electrical problems or the voiding of warranties might result from improper installation.
How long does it take to replace a car battery?
Depending on the intricacy of the vehicle, a professional replacement usually takes 15 to 30 minutes. If you are not familiar with the location of batteries or safety considerations, replacing them yourself can take longer.
Can I use a different type of battery than recommended?
It’s not a good idea. Poor performance, electrical problems, and a shorter battery life might result from using a battery with the incorrect characteristics, such as size, CCA rating, or technology.
Conclusion
Owning a car will inevitably require battery replacements, but you can make wiser, more economical choices if you are aware of the costs, types of batteries, and replacement possibilities. Although costs differ according to battery type, car make, labor, and location, being aware of what to anticipate helps you plan your budget and prevent overspending.
Battery life can be increased and the chance of unplanned breakdowns decreased by routine maintenance, safe driving practices, and prompt replacement. Choosing the appropriate battery and installation technique guarantees dependability and long-term savings, regardless of whether you go with a dealership, neighborhood technician, or do-it-yourself repair.
You can reduce costs, keep your automobile operating smoothly, and avoid the annoyance of a dead battery at the worst possible time by being aware and proactive.
Related Posts:
")
")


")
")


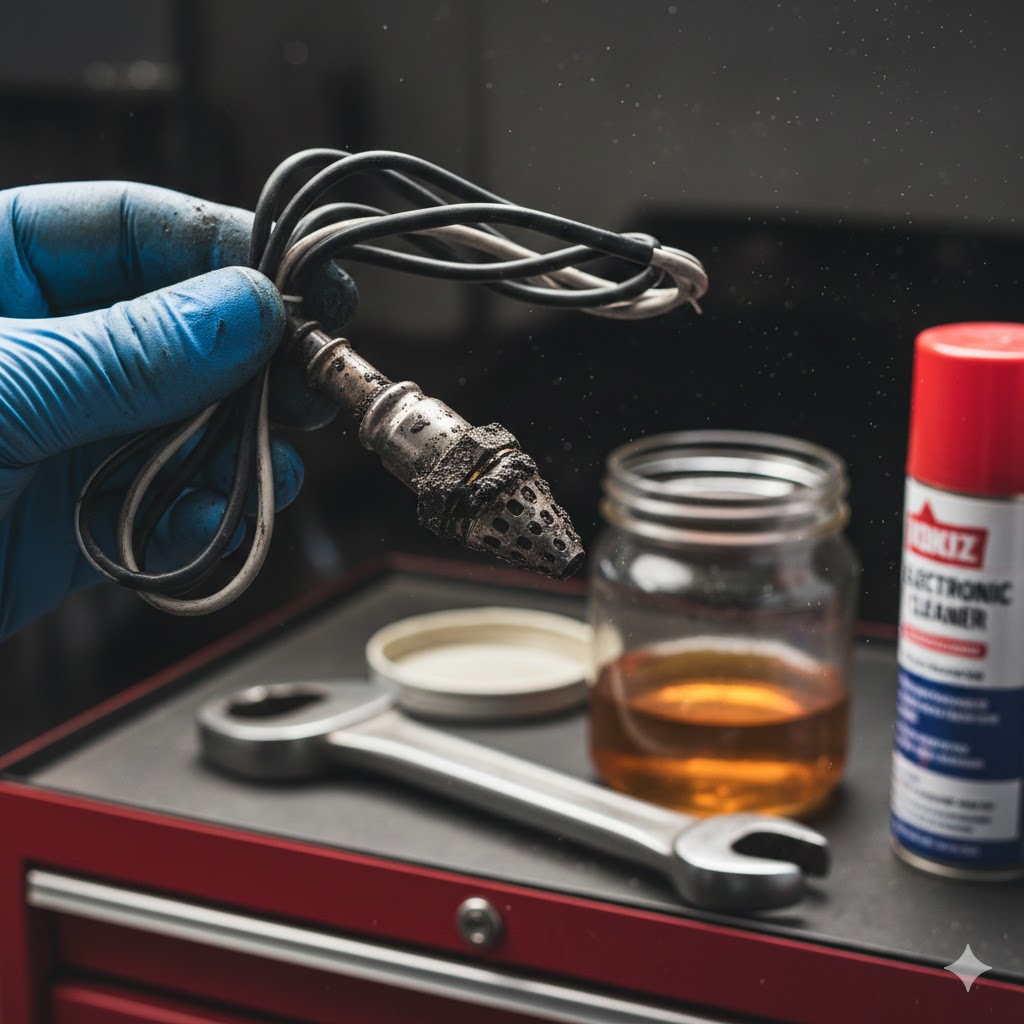
The engine performance, fuel economy, and emissions control of your car all depend heavily on the oxygen sensor. It continuously measures the amount of oxygen in the exhaust gases and transmits this information to the engine control unit (ECU), which modifies the air-fuel mixture for the best possible combustion.
The oxygen sensor may provide erroneous readings to the ECU if it gets polluted by carbon deposits, oil residue, or fuel additives. Common driving problems including low fuel economy, rough idling, decreased engine power, and an illuminated check engine light are frequently the result of this.
For automobile owners who wish to improve engine performance without having to replace the sensor right away, learning how to clean an oxygen sensor can be a useful and affordable alternative. Cleaning can assist prolong the life of a failing or worn-out sensor and enhance engine responsiveness when contamination is the primary problem, but it is not a long-term solution.
This guide will help you make an informed decision before spending money on needless replacements by providing a clear, experience-based explanation of when oxygen sensor cleaning makes sense, how it affects your car, and what to expect from the process.

What Is an Oxygen Sensor and How Does It Work?
An essential part of your car’s engine management and emissions control system is an oxygen sensor, sometimes known as an O2 sensor. It measures the amount of unburned oxygen in the exhaust gases and is inserted in the exhaust system. The engine control unit (ECU) receives this data continually, enabling the engine to modify the air-fuel mixture for effective combustion. Your engine runs smoothly, consumes fuel effectively, and emits less dangerous emissions when the mixture is right.
For modern cars to operate at their best, precise oxygen sensor readings are crucial. The ECU recognizes a lean condition and supplies more fuel if the sensor finds excessive oxygen in the exhaust. The ECU lowers fuel supply to avoid a rich mixture if it detects insufficient oxygen. This equilibrium can be upset by even tiny errors brought on by carbon buildup or dirt, which can result in obvious performance issues. Because of this, it’s crucial to comprehend how the oxygen sensor functions before trying to clean it.
How Oxygen Sensors Communicate With the Engine
Based on the amount of oxygen in the exhaust gases, oxygen sensors produce a voltage signal. As driving conditions vary, this signal varies quickly, particularly in upstream sensors that are situated before the catalytic converter. The ECU continuously evaluates these voltage variations and modifies fuel injection and ignition timing in real time. Contamination slows down the sensor’s response time, which results in delayed or inaccurate adjustments that have a detrimental impact on emissions and engine economy.
The majority of cars have several oxygen sensors. While downstream oxygen sensors keep an eye on the catalytic converter’s effectiveness, upstream oxygen sensors—also known as pre-catalytic sensors—are in charge of controlling the air–fuel combination.
Heated oxygen sensors (HO2S) are used in some cars, and they immediately warm up to give precise readings soon after starting up. It’s crucial to know what kind of oxygen sensor you’re working with because upstream sensors are more sensitive and more likely to exhibit obvious symptoms when they get dirty.
Understanding how oxygen sensors work and how they affect engine performance provides a strong basis for understanding when cleaning is necessary and how it can assist restore correct readings.
Read also: Mass Air Flow Sensor Cleaner: How to Clean MAF Sensor Safely
Signs Your Oxygen Sensor Is Dirty or Failing
Long before it totally fails, a dirty oxygen sensor frequently exhibits warning indicators. Even small contamination might produce obvious performance problems because the sensor directly influences how your engine controls fuel and pollutants. Early detection of these indications will help you determine whether replacing the oxygen sensor is a better alternative or if cleaning it is worthwhile.
Check Engine Light Comes On
A check engine light is one of the most typical indicators of a filthy oxygen sensor. The system identifies an anomalous air-fuel combination and saves a fault code when the sensor provides inaccurate or slow-reacting data to the ECU. These codes frequently have to do with fuel mixture imbalance, sluggish reaction, or oxygen sensor performance. A check engine light is frequently the first sign that cleaning or more testing is required, even if it does not always indicate that the sensor is defective.
Poor Fuel Economy
The engine may run richer than necessary due to a dirty oxygen sensor, which would increase fuel consumption. A dirty oxygen sensor may be the reason if you find that you’re filling up the tank more frequently without changing your driving behavior. In certain cases, cleaning the sensor might assist increase fuel efficiency and restore correct readings, particularly if the buildup is minor.
Rough Idling and Engine Hesitation
When the oxygen sensor provides delayed or inaccurate readings, the ECU struggles to maintain the correct air–fuel ratio. This can result in rough idling, engine hesitation during acceleration, or even stalling in severe cases. These symptoms are particularly noticeable at low speeds or when the engine is warming up.
Failed or Poor Emissions Test Results
Because oxygen sensors are essential for controlling emissions, a dirty sensor might increase the amount of dangerous exhaust gases your car produces. This frequently results in higher-than-normal readings during inspections or failed emissions testing. If contamination is the main problem, cleaning the oxygen sensor may help temporarily reduce emissions.
Dirty vs. Failing Oxygen Sensor
Differentiating between an oxygen sensor that is unclean and one that is malfunctioning because of internal damage or aging is crucial. Cleaning is a feasible solution because a filthy sensor may still work but react slowly. However, replacement is typically the only dependable option if the sensor is outdated, physically damaged, or continuously generating error signals even after cleaning.
Can You Clean an Oxygen Sensor? What Experts Recommend
Many car owners are unsure if cleaning an oxygen sensor is a permanent fix or merely a stopgap measure. In the middle is where the truth is found. Cleaning an oxygen sensor can be helpful in some circumstances, but it is not a permanent solution, especially for older or internally damaged sensors, according to automotive specialists and skilled mechanics.
When Cleaning an Oxygen Sensor Makes Sense
When an oxygen sensor is polluted by carbon deposits, fuel additives, or light oil residue but is still physically sound, cleaning it can be beneficial. Poor fuel quality, brief driving excursions that hinder adequate engine warm-up, or small oil leaks that let impurities enter the exhaust system are frequently the causes of this condition. In these situations, cleaning could enhance idle quality, fuel efficiency, and throttle response while also restoring the sensor’s responsiveness.
Why Manufacturers Often Recommend Replacement
The majority of automakers do not formally advise cleaning oxygen sensors. This is due to the sensor element’s delicate nature and precise operating conditions. The sensor may be harmed by harsh cleaning techniques or inappropriate chemicals, which could result in erroneous readings or total failure. Because of this, manufacturers typically recommend replacing an oxygen sensor as soon as it starts to exhibit problems, particularly after it has achieved its anticipated service life, which is normally between 60,000 and 100,000 miles.
Cleaning vs. Replacement: A Practical Perspective
Practically speaking, cleaning an oxygen sensor may be worthwhile if you’re trying to determine whether the sensor is actually defective or debugging performance concerns on a tight budget. Experts advise against viewing cleaning as a long-term fix, but rather as a diagnostic or short-term fix. The safer and more dependable course of action is to replace the sensor if it still generates error codes or if symptoms recur soon after cleaning.
Expert Tip Before You Decide
It is advised to check your car for error codes and rule out other problems like exhaust leaks, vacuum leaks, and defective spark plugs before cleaning an oxygen sensor. These issues may be mistaken for oxygen sensor failure and result in needless replacement or cleaning.
Tools and Materials Needed to Clean an Oxygen Sensor
It’s crucial to assemble the necessary equipment and supplies before you start cleaning an oxygen sensor. In addition to making the task simpler, using the right tools lowers the possibility of harming the sensor or other engine parts. Because oxygen sensors are sensitive and subjected to high temperatures, cleaning them safely and effectively requires careful handling with the right equipment.
Essential Tools
An oxygen sensor socket or an appropriate wrench that fits around the sensor’s wiring without damaging it are required to remove and reinstall the oxygen sensor. If the sensor is situated beneath the car, a jack and jack stands could also be required. Wheel chocks should always be used to keep the automobile from rolling while it is being elevated. You can also access sensors in awkward or confined spaces by using a ratchet and extension.
Cleaning Materials
A sensor-safe cleaning solution, such as an oxygen sensor cleaner or a non-residue brake or carburetor cleaner, is the most crucial component. These products are made to remove carbon accumulation without creating hazardous deposits. Additionally, you might need paper towels or lint-free cloths for drying, a clean container for soaking the sensor, and a gentle brush to remove any loose dirt. Abrasive materials should be avoided as they may harm the delicate sensor tip.
Safety Equipment
A sensor-safe cleaning solution, such as an oxygen sensor cleaner or a non-residue brake or carburetor cleaner, is the most crucial component. These products are made to remove carbon accumulation without creating hazardous deposits. Additionally, you might need paper towels or lint-free cloths for drying, a clean container for soaking the sensor, and a gentle brush to remove any loose dirt. Abrasive materials should be avoided as they may harm the delicate sensor tip.
Safety Precautions Before Cleaning an Oxygen Sensor
Although cleaning an oxygen sensor might appear simple, neglecting fundamental safety precautions could result in harm to yourself or damage to your car. Before you start the cleaning procedure, you must take the necessary measures since oxygen sensors are mounted in the exhaust system and function at very high temperatures.
Let the Engine Cool Completely
Before attempting to remove an oxygen sensor, always let the engine and exhaust system cool completely. Touching exhaust components too quickly can result in severe burns since they can stay hot long after the engine is shut down. Additionally, there is less chance of injuring the sensor threads during removal if the engine is fully cooled.
Disconnect the Battery
Disconnect the battery’s negative terminal before working on any engine-related parts. When unplugging the oxygen sensor connector, this guards against unintentional electrical shorts and shields the engine control unit (ECU) from possible harm.
Work in a Well-Ventilated Area
Strong fumes from the majority of oxygen sensor, brake, and carburetor cleaners can be dangerous if inhaled in enclosed areas. To minimize exposure to chemical fumes, always operate outside or in a garage with enough ventilation.
Handle the Sensor With Care
Particularly at the sensing tip, oxygen sensors are delicate. Oils and dirt can interfere with the sensor’s functionality, so don’t drop it or touch the tip with your fingers. Scraping the sensor with sharp objects or abrasive materials might cause irreversible damage to the detecting element.
Use Proper Vehicle Support
Make sure the automobile is firmly supported by jack stands set on stable ground if you need to access the sensor from underneath it. A hydraulic jack can malfunction at any time, therefore you should never rely on it exclusively.
How to Clean an Oxygen Sensor (Step-by-Step Guide)
It takes time and careful attention to detail to clean an oxygen sensor. When carried out properly, it can eliminate carbon accumulation and bring back more precise results, particularly if the sensor is only slightly contaminated. To get the best results and prevent sensor damage, carefully follow the instructions below.
Step 1: Locate the Oxygen Sensor
The exhaust system is equipped with oxygen sensors. The majority of cars are equipped with a minimum of two sensors, one upstream and one downstream of the catalytic converter. Downstream sensors are located farther back along the exhaust pipe, whereas upstream sensors are often installed on the exhaust manifold. If you’re not sure where it is, go to the service handbook for your car.
Step 2: Disconnect the Electrical Connector
Unplug the oxygen sensor’s electrical link after the engine has fully cooled. Gently pull the connector apart without pushing it by pressing the release tab. Steer clear of physically pulling on the wires as this may result in internal damage and subsequent inaccurate readings.
Step 3: Remove the Oxygen Sensor
Using an oxygen sensor socket or a suitable wrench, carefully loosen the sensor by turning it counterclockwise. If the sensor is stuck due to heat or corrosion, apply a small amount of penetrating oil and allow it to sit for a few minutes before trying again. Take your time during this step to avoid stripping the threads or breaking the sensor.
Step 4: Inspect the Sensor for Contamination
After removal, take a close look at the sensor tip. The detecting element of a dirty oxygen sensor usually has light greasy residue or black carbon deposits. Cleaning might not work if the sensor looks fractured, severely corroded, or covered in heavy oil deposits; in these cases, replacement is typically preferable.
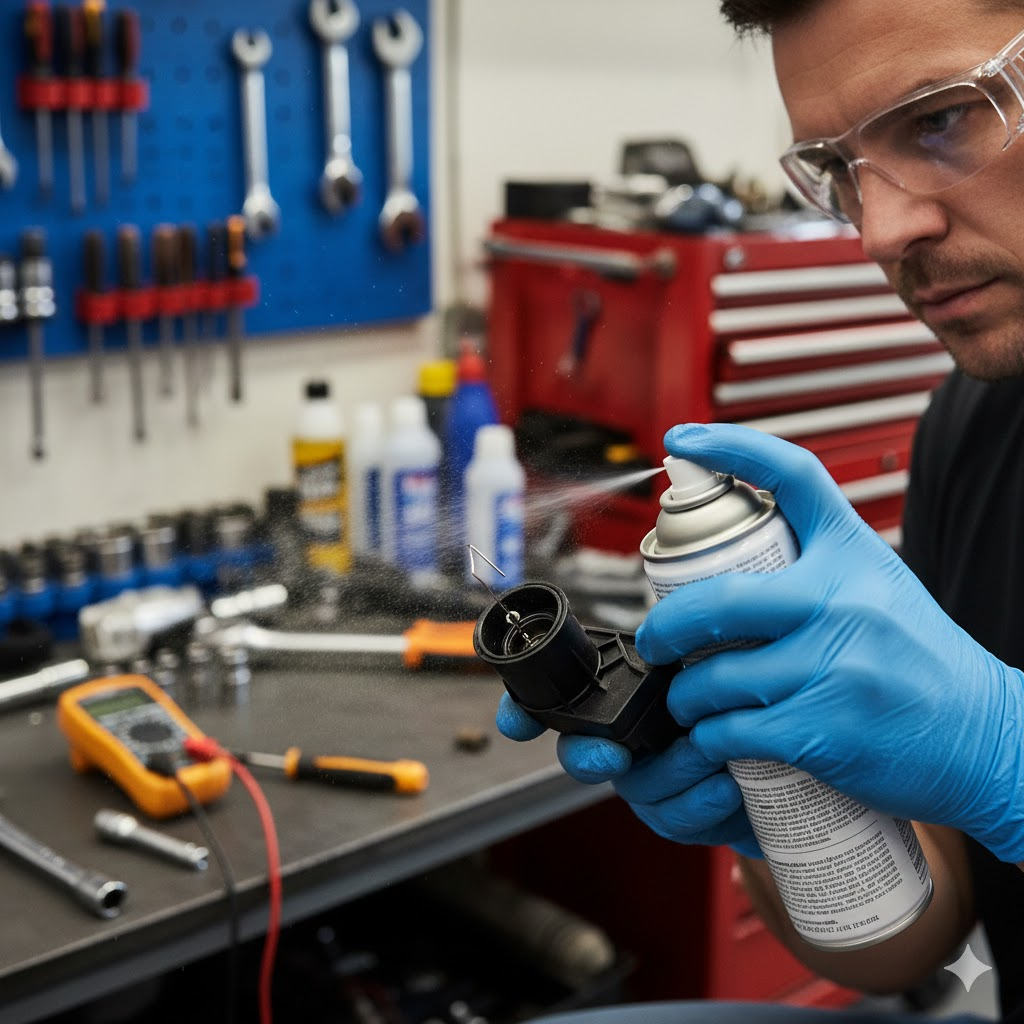
Step 5: Clean the Oxygen Sensor Properly
Put the sensor tip in a container and liberally spray it with a carburetor cleaner, brake cleaner, or sensor-safe cleaning. To remove carbon buildup, let the sensor soak for ten to fifteen minutes. You can gently shake the sensor in the cleaner, but avoid using sharp objects or scrubbing the tip. Do not clean the wiring or electrical connector.
Step 6: Allow the Sensor to Dry Completely
After cleaning, take the sensor out of the cleaner and allow it to fully air dry. The delicate sensor device may be harmed if compressed air or cloths are used to expedite drying. A thorough drying process guarantees that no residue is left behind that can affect sensor readings.
Step 7: Reinstall the Oxygen Sensor
To prevent cross-threading, carefully reposition the oxygen sensor by hand. Once hand-tight, tighten it tightly with your wrench, adhering to any relevant manufacturer torque guidelines. Make sure the electrical connector clicks firmly into position after reconnecting it.
Step 8: Reconnect the Battery and Test the Vehicle
Start the engine after reconnecting the battery terminal. Check for warning lights after letting it idle. You might need to use an OBD-II scanner to delete the error codes if the check engine light was previously on. Take a quick test drive to discover if the car performs better and uses less gasoline.
Read also: Best Fuel Injector Cleaner: Top Picks, Benefits, and Buying Guide
How to Clean an Oxygen Sensor Without Removing It
Some automobile owners seek methods to clean an oxygen sensor without physically removing it from the exhaust system because they prefer a less involved technique. Even if this approach is more practical, it’s crucial to recognize its limitations and know when it might actually be helpful.
Using Fuel Additives to Clean Oxygen Sensors
Fuel system cleaners and oxygen sensor cleaning additives are designed to reduce carbon buildup inside the engine and exhaust system. These products are added directly to the fuel tank and whow to clean oxygen sensorork gradually as the engine runs. Over time, they can help burn off light carbon deposits on the oxygen sensor, especially if the contamination is minor and caused by poor fuel quality or short driving cycles.
This method is best suited for preventive maintenance rather than fixing severe oxygen sensor issues. If the sensor is only slightly dirty, using a high-quality fuel additive may improve sensor response and fuel efficiency after several driving cycles.
Pros and Cons of Cleaning Without Removal
Convenience is this method’s greatest benefit. Lifting the car, removing parts, or handling delicate parts are not necessary. Additionally, there is less chance that the sensor will be harmed during removal. The drawback is that it is significantly less efficient than cleaning by hand. Heavy carbon accumulation, oil pollution, and debris from mechanical problems like worn piston rings or oil leaks cannot be removed by fuel additives.
When This Method Is Worth Trying
If there are no persistent problem codes and your car is exhibiting moderate symptoms like occasional hesitation or slightly decreased fuel economy, cleaning an oxygen sensor without removing it may be worthwhile. If the check engine light is always on or if diagnostic codes point to a sensor failure, it should not be trusted.
Common Mistakes to Avoid When Cleaning an Oxygen Sensor
If there are no persistent problem codes and your car is exhibiting moderate symptoms like occasional hesitation or slightly decreased fuel economy, cleaning an oxygen sensor without removing it may be worthwhile. If the check engine light is always on or if diagnostic codes point to a sensor failure, it should not be trusted.
Using the Wrong Cleaning Chemicals
Using improper chemicals, such as WD-40, gasoline, engine degreasers, or home solvents, is one of the most frequent mistakes. Inaccurate readings may result from these products damaging the sensing element or leaving residues on the sensor. Always use a carburetor cleaning, brake cleaner, or sensor-safe cleaner that evaporates cleanly and leaves no residue behind.
Scraping or Touching the Sensor Tip
An oxygen sensor’s detecting component is incredibly sensitive. The sensor can be irreversibly harmed by using screwdrivers, wire brushes, or sandpaper to remove carbon deposits. In a similar vein, using bare fingers to contact the sensor tip may transmit oils that prevent it from functioning properly. Instead of using physical force, cleaning should rely on soaking and mild chemical action.
Reinstalling the Sensor Before It Dries
Another common error is to reinstall the oxygen sensor before it has completely air-dried. Sensor performance may be impacted by trapped moisture or cleaning residue, which could result in new error codes. Before replacing the sensor, always give it enough time to dry.
Ignoring Underlying Engine Problems
Frequently, a dirty oxygen sensor is a symptom rather than the underlying reason. A cleaned sensor can be rapidly recontaminated by oil leaks, rich fuel mixes, misfires, or coolant leaks. Cleaning may become ineffective and cause recurrent troubles if these underlying problems are not addressed.
Assuming Cleaning Is a Permanent Fix
A lot of individuals think that cleaning will permanently fix an oxygen sensor. In actuality, cleaning is typically only a short-term fix. Replacement is frequently the most dependable and economical choice if the sensor is outdated or frequently generating error signals.
How Long Does a Cleaned Oxygen Sensor Last?
An oxygen sensor’s function can be momentarily restored by cleaning it, but it’s crucial to have reasonable expectations about how long the recovery will continue. The type of contamination, the age of the sensor, and the general health of the engine all affect how long a cleaned sensor lasts.
Temporary Improvement vs. Permanent Solution
For a few thousand miles, a cleaned oxygen sensor usually exhibits discernible improvements in throttle response, idle smoothness, and fuel efficiency if the contamination was minor. However, cleaning cannot permanently restore internal wear, severe carbon buildup, or oil pollution. Replacement is the most dependable course of action in these situations because symptoms frequently return quickly.
Factors That Affect Longevity
-
Driving habits: Frequent short trips that don’t allow the engine to reach optimal temperature can lead to quicker sensor contamination.
-
Fuel quality: Poor-quality fuel or fuel with high ethanol content can contribute to faster carbon buildup.
-
Engine condition: Oil leaks, worn piston rings, or misfires can deposit residues on the sensor repeatedly.
Realistic Expectations
It is advisable to think of cleaning as a diagnostic or short-term maintenance procedure rather than a long-term solution. To guarantee accurate readings and long-term engine performance, replacement is advised if your sensor is more than 80,000–100,000 miles old or continues to display error codes even after cleaning.
When You Should Replace Instead of Clean an Oxygen Sensor
In certain cases, replacing an oxygen sensor is the only dependable option, even if cleaning it can occasionally restore its functionality. Recurring problems, wasted time, and possible engine damage can all be avoided by knowing when to replace the sensor.
Sensor Age and Wear
Depending on your car and driving circumstances, oxygen sensors usually have a limited lifespan of 60,000 to 100,000 miles. Cleaning won’t make sensors that are close to or beyond this mileage responsive again because they frequently experience internal failures. Replacement is the safest course of action in these situations.
Persistent Error Codes
The sensor may be malfunctioning electrically rather than being dirty if your car’s check engine light stays on or diagnostic scans reveal recurring O2 sensor faults even after cleaning. The ECU cannot make inaccurate air-fuel adjustments thanks to a new sensor that guarantees reliable data.
Physical Damage
Excessive heat, coolant or oil contamination, or improper handling during prior maintenance can all harm oxygen sensors. In order to restore appropriate engine performance, sensors that are bent, rusted, or cracked must be replaced rather than cleaned.
Impact on Engine Performance
Fuel economy, throttle responsiveness, and emissions management are all improved by replacing a malfunctioning oxygen sensor, frequently more successfully than by frequent cleaning. Replacement offers a long-term solution for drivers who have frequent misfires, rough idling, or excessive fuel consumption.
Cost Comparison: Cleaning vs. Replacing an Oxygen Sensor
Cost is a significant consideration when choosing whether to clean or replace an oxygen sensor. You can select the most sensible and economical course of action by being aware of the associated costs.
DIY Cleaning Costs
Cleaning an oxygen sensor yourself is relatively inexpensive. The main costs include:
-
Sensor-safe cleaner or carburetor/brake cleaner: $5–$15
-
Oxygen sensor socket or wrench (if not already owned): $10–$20
-
Safety gear (gloves, goggles): $5–$10
Overall, DIY cleaning can be done for $20–$45, making it a budget-friendly way to address minor contamination issues.
Replacement Costs
The cost of replacing an oxygen sensor varies depending on the vehicle make and sensor type:
-
Aftermarket oxygen sensor: $30–$80
-
OEM oxygen sensor: $80–$200
-
Professional labor: $50–$150 per sensor (if not doing it yourself)
Depending on whether you choose an OEM or aftermarket sensor and whether you install it yourself or pay for it, the total replacement costs might vary from $80 to $350.
Frequently Asked Questions (FAQ) About Cleaning Oxygen Sensors
Can a Dirty Oxygen Sensor Cause Misfires?
Yes. A contaminated oxygen sensor can send inaccurate readings to the ECU, causing an improper air–fuel mixture. This can lead to misfires, rough idling, or hesitation during acceleration. Cleaning the sensor may temporarily improve performance, but persistent misfires may indicate a failing sensor or another engine issue.
Does Cleaning an O2 Sensor Improve Fuel Economy?
Restoring reliable signals from a little polluted oxygen sensor can assist increase fuel efficiency. However, if the sensor is outdated or severely damaged, the improvement is typically slight and transient. Long-term fuel efficiency depends on proper maintenance and fixing underlying engine problems.
Can I Use WD-40 or Gasoline to Clean the Sensor?
The delicate sensor element may be harmed by WD-40, gasoline, or other common household chemicals. Always use brake, carburetor, or sensor-safe cleaners that evaporate without leaving residue.
How Often Should Oxygen Sensors Be Cleaned?
Oxygen sensors are not typically cleaned as part of routine maintenance. Cleaning is only recommended when symptoms of contamination appear, such as a check engine light, rough idling, or decreased fuel economy. For long-term reliability, replacement according to manufacturer recommendations is preferred.
Can Cleaning an Oxygen Sensor Fix All Engine Performance Issues?
No. A dirty oxygen sensor is often a symptom rather than the root cause of engine problems. Issues like oil leaks, misfires, or vacuum leaks can also affect sensor performance. Cleaning may help temporarily, but addressing the underlying problem is essential for lasting results.
Conclusion
Cleaning an oxygen sensor can be a practical and affordable solution to increase fuel efficiency, eliminate small carbon buildup, and temporarily restore engine performance. It’s crucial to recognize its limitations, though, as cleaning is not a long-term solution and worn-out or broken sensors frequently need to be replaced for dependable long-term functioning.
Car owners can safely attempt do-it-yourself cleaning by identifying the symptoms of a filthy oxygen sensor, using the right equipment and cleaning techniques, and avoiding frequent mistakes. Replacement is still the most reliable option for sensors that are outdated, physically damaged, or consistently producing error codes. Your engine and oxygen sensors will continue to function well for many years with proper upkeep, high-quality fuel, and prompt repairs.
Maintaining the smooth and effective operation of your engine depends heavily on a Mass Air Flow (MAF) sensor cleaner. The engine control unit (ECU), which modifies fuel delivery for ideal combustion, receives data from the mass air flow sensor on the amount of air entering the engine. Inaccurate readings may result from the sensor becoming coated over time by dust, oil vapors, and debris from the air intake system.
Drivers may experience symptoms like rough idling, poor acceleration, decreased fuel economy, or even a check engine light when this occurs. Accurate airflow readings can be restored without harming the sensitive sensor components by using a specialized mass air flow sensor cleaning.
Cleaning the MAF sensor is one of the easiest and least expensive preventive measures a car owner can take, according to practical automotive repair expertise. In contrast to replacing the sensor, which can be costly, appropriate cleaning using a sensor-safe cleaner frequently fixes performance problems in a matter of minutes. But not all cleaners are appropriate, and treating the sensor incorrectly can cause irreversible damage.
In order to assist you understand when, why, and how to use a mass air flow sensor cleaner effectively, this guide was designed. It combines practical hands-on knowledge, manufacturer-recommended practices, and safety-focused advice.
What Is a Mass Air Flow Sensor?
An essential part of engine control, a mass air flow (MAF) sensor measures the precise amount of air entering the engine. The engine control unit (ECU) receives this data in real time and uses it to determine the proper air-to-fuel ratio for effective combustion. The engine runs smoothly, produces more power, and maintains maximum fuel efficiency when the ECU receives accurate airflow data. Even little errors from the MAF sensor can have a significant impact on performance because modern engines rely so heavily on accurate sensor data.
Hot wire or hot film MAF sensors are used in the majority of automobiles. These incredibly sensitive sensors are made to measure temperature variations brought on by entering air in order to identify changes in airflow. The sensor is continuously exposed to dust, oil residue, and other impurities because it is situated immediately in the intake air stream. Regular maintenance and appropriate cleaning are crucial for preserving engine dependability and emissions compliance since these deposits eventually interfere with airflow readings.

How a Mass Air Flow Sensor Works
The volume and density of air entering the engine through the intake system are precisely measured by the mass air flow sensor. The sensor in the majority of contemporary cars has a thin heated wire or film element. This element is cooled as air passes over it.
The amount of electrical current required to maintain the element’s temperature is then determined by the sensor. The sensor is named a mass air flow sensor instead of just an airflow meter because the mass of air entering the engine directly correlates with the amount of current needed.
The engine control unit (ECU) receives this airflow data continually and uses it to modify the timing and amount of fuel injection. The ECU can maintain a perfect air-fuel mixture when the MAF sensor is clean, guaranteeing smooth acceleration, steady idling, and economical fuel use.
Nevertheless, airflow values become erroneous when impurities coat the sensor element, leading the ECU to supply either too much or too little fuel. Drivability problems, higher emissions, and decreased engine performance are frequently caused by this imbalance, underscoring the significance of thorough cleaning using a specialized mass air flow sensor cleaner.
Where the Mass Air Flow Sensor Is Located
Usually found in the air intake system, the mass air flow sensor is situated between the throttle body and the air filter housing. It is one of the simpler sensors to reach for cleaning and inspection because it is typically installed directly to the intake duct or air filter box in cars.
Depending on the vehicle’s design, the sensor enclosure is fastened with screws or clamps and typically has an electrical connector attached to it. The MAF sensor is continuously exposed to airborne particles and pollutants since it is in the direct path of entering air.
The function is the similar for the majority of gasoline and diesel vehicles, while the precise location may differ significantly depending on the manufacturer and engine configuration.
When the hood is opened and the air intake pipe is traced from the air filter in popular models from Toyota, Honda, Ford, Nissan, and comparable brands, the MAF sensor is easily visible. Before doing any cleaning, it is crucial to understand the precise placement because misidentifying it with adjacent sensors, like the intake air temperature sensor, can result in damage or incorrect maintenance.
Read also: Camshaft Position Sensor Symptoms
What Is a Mass Air Flow Sensor Cleaner?
A mass air flow sensor cleaner is a specially made spray that is intended to safely remove carbon buildup, oil residue, and grime from the sensitive sensing components inside a MAF sensor. MAF sensor cleaners are non-conductive, quickly evaporate, and leave no residue, in contrast to general-purpose cleaners. This is crucial since the sensor’s interior parts are highly sensitive and can sustain irreversible damage from physical contact or harsh chemicals. Using a specialized cleaner guarantees that the sensor is thoroughly cleaned without compromising its longevity or accuracy.
From the perspective of automotive maintenance, both professional mechanics and car manufacturers advocate mass air flow sensor cleaning as a sensor-safe alternative. It is far safer than alternatives like brake or carburetor cleaning because it is designed specifically for electronic components exposed to airflow.
The significance of using the proper MAF sensor cleaner as part of regular automotive maintenance is emphasized by the fact that it helps restore accurate airflow readings, enhance engine efficiency, and avoid needless sensor replacement.
How Mass Air Flow Sensor Cleaner Works
Contaminants that build up on the sensitive sensing components of the sensor over time are broken down and dissolved by mass air flow sensor cleaning. The hot wire or hot film inside the MAF sensor may become coated by tiny dust particles, oil vapors from the crankcase ventilation system, and residue from aftermarket air filters as air flows through the intake system. In order to prevent harming the delicate sensor components, the cleanser quickly penetrates these deposits and takes them away when sprayed.
In order to prevent any residue from interfering with electrical signals or airflow measurements, the recipe is made to evaporate swiftly and completely. The sensor can measure entering air accurately once again and transmit exact data to the engine control unit (ECU) once the impurities have been eliminated and it has dried.
As a result, the engine runs more smoothly, fuel efficiency increases, and optimum fuel delivery is restored. Mass air flow sensor cleaner is one of the safest and most efficient maintenance options for resolving airflow-related performance concerns because of its non-invasive cleaning action.
Signs Your Mass Air Flow Sensor Needs Cleaning
As impurities accumulate on the sensor, these symptoms frequently appear gradually. By taking care of them early on using an appropriate mass air flow sensor cleaner, more drivability problems and expensive repairs can be avoided.
-
Rough or unstable engine idle
-
Hesitation or jerking during acceleration
-
Reduced engine power and sluggish throttle response
-
Poor fuel economy despite normal driving habits
-
Engine stalling, especially at low speeds or when stopping
-
Check engine light illuminated with common MAF-related codes (P0100, P0101, P0102, P0103, P0104)
-
Difficulty starting the engine in some cases
Benefits of Using a Mass Air Flow Sensor Cleaner
Restores Accurate Air-Fuel Ratio
The engine control unit (ECU) obtains accurate airflow data when the MAF sensor is clean. This makes it possible for the ECU to supply the right amount of fuel for combustion, which improves engine performance overall and produces smoother idling and steady acceleration. Inaccurate readings from a dirty sensor might result in misfires, hesitation, or rough idle.
Improves Engine Performance
The engine reacts to throttle input more efficiently when precise airflow data are maintained. Even in older cars, drivers frequently observe improved acceleration, faster throttle response, and steady power delivery. By cleaning the sensor, performance problems are avoided before they become more serious and require expensive repairs.
Increases Fuel Efficiency
The engine may overfuel or underfuel as a result of a dirty MAF sensor, increasing fuel consumption. Frequent cleaning improves fuel distribution, saving you money at the pump and cutting down on needless fuel waste.
Reduces Emissions
Efficient combustion, which reduces hazardous exhaust emissions, is supported by accurate airflow measurement. This lessens your environmental impact while also assisting your car in passing emission tests.
Extends Sensor Lifespan
By using a specific MAF sensor cleaner, accumulation that can harm the sensor irreversibly is avoided. Frequent maintenance prolongs the MAF sensor’s life and prevents costly replacements.
Supports Preventive Maintenance
As part of regular maintenance, cleaning the MAF sensor keeps your engine and intake system in good working order. Preventive maintenance keeps the car operating smoothly, lowers the chance of engine problems, and guarantees long-term dependability.
How to Clean a Mass Air Flow Sensor (Step-by-Step Guide)
1. Gather the Necessary Tools and Materials
Before starting, ensure you have everything you need:
-
MAF sensor cleaner spray (never use carb or brake cleaner)
-
Screwdriver or socket set (depending on your sensor’s mounting)
-
Gloves and safety glasses to protect your hands and eyes
-
Clean lint-free cloth (optional, for wiping around the sensor housing)
2. Prepare Your Vehicle
-
Turn off the engine and disconnect the battery to prevent electrical short circuits.
-
Locate the MAF sensor between the air filter box and the throttle body.
3. Remove the MAF Sensor
-
Carefully unplug the electrical connector from the sensor.
-
Unscrew or unclamp the sensor from the intake duct.
-
Avoid touching the sensor element directly, as it is extremely delicate.
4. Apply the MAF Sensor Cleaner
-
Hold the sensor over a clean surface.
-
Spray the MAF sensor cleaner generously on the sensor wires or film.
-
Avoid using cloth or brushes, which can damage the sensor.
-
Spray all accessible surfaces lightly to remove dirt, oil, and debris.
5. Let the Sensor Dry
-
Allow the sensor to air dry completely for at least 10–15 minutes.
-
Ensure there is no moisture or cleaner residue before reinstalling.
6. Reinstall the MAF Sensor
-
Carefully place the sensor back into the intake duct and secure screws or clamps.
-
Reconnect the electrical connector.
-
Reconnect the battery and start the engine to ensure proper operation.
7. Recommended Cleaning Interval
-
For most vehicles, clean the MAF sensor every 15,000–30,000 miles, or more frequently in dusty conditions.
-
Regular maintenance prevents drivability issues and extends the sensor’s lifespan.
Best Mass Air Flow Sensor Cleaners — Pros and Cons
CRC Mass Air Flow Sensor Cleaner

Both expert mechanics and do-it-yourself car enthusiasts strongly recommend CRC Mass Air Flow Sensor Cleaner. Delicate sensor components are carefully cleaned by its non-residue composition, which evaporates fast to prevent any residual moisture from interfering with readings. The cleaner is perfect for routine maintenance because it effectively removes carbon buildup, dust, and oil.
Pros:
-
Gentle on sensitive sensor components
-
Fast-drying formula
-
Affordable and widely available
Cons:
-
Spray nozzle can be broad, making precise application tricky
-
May require multiple applications for heavily contaminated sensors
Liqui Moly Air Flow Sensor Cleaner

Automotive experts use Liqui Moly Air Flow Sensor Cleaner, a high-end German product. Its potent yet sensor-safe solution effectively eliminates tenacious deposits without causing harm to the sensor. It provides dependable results for extensive maintenance and works especially well on severely clogged MAF sensors.
Pros:
-
Highly effective on heavy buildup
-
Sensor-safe and non-residue formula
-
Trusted by professional mechanics
Cons:
-
Higher cost compared to standard options
-
Less readily available in some regions, may require online purchase
WD-40 Specialist Mass Air Flow Cleaner

Convenience and sensor-safe chemicals are combined in the WD-40 Specialist Mass Air Flow Cleaner for efficient cleaning. It is a good option for regular maintenance because of its quick-drying formula and easy-to-use spray nozzle, which enable accurate application. Most automobile owners can afford it because it strikes a compromise between price and performance.
Pros:
-
Quick-drying, residue-free formula
-
Easy-to-use spray head for precise application
-
Affordable and accessible
Cons:
-
Less aggressive on severe buildup
-
May require repeated sprays for heavily contaminated sensors
Common Mistakes to Avoid When Cleaning a MAF Sensor
Touching the Sensor Element
A MAF sensor’s wires or film are incredibly fragile. The element may be bent, broken, or otherwise damaged by physical contact, which could lead to erroneous airflow readings or total sensor failure. When cleaning, always use a cleaner that is safe for sensors and keep your hands away from the sensor.
Using Compressed Air
Blasting the sensor with compressed air might irreversibly harm its small wires or film, even though it might seem like a quick fix. High-pressure air can distort or shatter the sensor elements in MAF sensors, which are made to monitor airflow precisely.
Using the Wrong Cleaner
Although brake or carburetor cleaners may seem practical, they contain strong chemicals that might corrode or harm the sensitive parts of the sensor. Always use a non-conductive, residue-free mass air flow sensor cleaning.
Reinstalling Before the Sensor is Dry
Before reinstalling, the sensor needs to be totally dry after cleaning. Installing a wet sensor may result in misfires, short circuits, or erroneous readings. Give it at least ten to fifteen minutes to air dry in a hygienic setting.
Ignoring Manufacturer Guidelines
There are particular maintenance guidelines for each car. Ignoring these could result in warranties being void or inefficient cleaning. Before trying to clean the sensor, always refer to the manufacturer’s instructions or owner’s handbook.
Is Mass Air Flow Sensor Cleaner Safe for All Cars?
Gasoline vs. Diesel Engines
As long as the product is marked “sensor-safe,” mass air flow sensor cleansers are typically safe for both gasoline and diesel engines. Diesel engines, however, frequently run in dustier or soot-prone settings, necessitating more frequent cleaning. Make sure the cleaner is appropriate for the particular kind of MAF sensor in your engine at all times.
Turbocharged and Direct Injection Engines
Higher airflow volumes and more accurate fuel management are features of cars with direct injection or turbochargers. For these engines, using a specific MAF sensor cleaner is crucial because any residue or damage can seriously impair performance. Carefully cleaning the sensor guarantees that the ECU gets correct information for the best fuel and boost delivery.
Manufacturer Recommendations
Certain MAF cleaning intervals and certified products are offered by certain automakers. Adhering to these guidelines insures proper engine performance, prolongs sensor life, and prevents warranties from being voided. Sensor damage and expensive repairs may result from using harsh or generic cleansers that are not recommended by the manufacturer.
Precautions for Older Vehicles
Sensors in older cars could be more fragile or more difficult to clean. In these situations, handling the component cautiously and using a mild, sensor-safe cleaning are essential. Replacing the sensor could be safer than repeatedly cleaning it if it is seriously polluted or damaged.
MAF Sensor Cleaning vs Replacement: Which Is Better?
Cost Comparison
It is significantly less expensive to clean a mass air flow sensor than to replace it. Depending on the make and model of the car, a new MAF sensor can cost anywhere from $100 to $300, while a bottle of sensor-safe cleaner usually costs between $8 and $15. In addition to saving money, routine cleaning avoids needless sensor purchases brought on by performance problems that could have been fixed with maintenance.
When Cleaning Is Enough
Cleaning with a specialized MAF sensor cleaner is typically adequate if the sensor is lightly soiled or covered with residue. After thorough cleaning, symptoms like rough idle, mild hesitation, or slightly decreased fuel efficiency frequently get better right away. Frequent preventive maintenance can prolong the sensor’s life and preserve engine efficiency, particularly in dusty or urban settings.
When Replacement Is Necessary
Cleaning might not be able to restore proper operation if the MAF sensor is severely contaminated, rusted, or physically destroyed. Replacement is the safer and more dependable choice if there are persistent check engine lights, irregular idle, or poor acceleration even after cleaning. Purchasing a new, OEM-approved sensor in these circumstances guarantees precise airflow readings and completely recovers engine performance.
Preventive Strategy
It is advised to combine regular cleaning with prompt replacement for the best possible engine health. While replacement guarantees continuing dependability after the sensor reaches the end of its service life, cleaning removes buildup before it compromises sensor accuracy. This strategy strikes a compromise between long-term car upkeep, performance, and cost.
Frequently Asked Questions (FAQ) About Mass Air Flow Sensor Cleaner
Can a dirty MAF sensor cause a car to stall?
Yes, the ECU may get inaccurate airflow data from a dirty MAF sensor, which could result in incorrect fuel delivery. This frequently causes the engine to stall, particularly while it is idle or performing low-speed maneuvers. If the sensor is not broken, cleaning it usually fixes these problems.
Will cleaning the MAF sensor clear the check engine light?
Yes, in a lot of situations. Cleaning the sensor and letting it dry will restore accurate airflow readings if a MAF-related error code (such as P0100–P0104) causes the check engine light. On the other hand, if the sensor is defective or damaged, the light can continue, signifying that it needs to be replaced.
Can I drive with a dirty mass air flow sensor?
Technically, yes, but it is not recommended. A dirty sensor can cause poor engine performance, reduced fuel efficiency, and increased emissions. Prolonged driving with a contaminated sensor may also strain other components like spark plugs and the catalytic converter.
How long does MAF sensor cleaner take to dry?
The majority of specialized cleaners evaporate in ten to fifteen minutes. To prevent erroneous readings or electrical problems, make sure the sensor is totally dry before replacing it.
Is MAF cleaner the same as throttle body cleaner?
No. although both are made for engine maintenance, throttle body cleaner is used to remove carbon buildup from throttle plates, while MAF cleaner is specifically made for sensitive sensor components. A MAF sensor may sustain harm if the incorrect cleaning is used on it.
How often should I clean my MAF sensor?
Most cars can be cleaned every 15,000 to 30,000 miles. To maintain optimal performance, more regular cleaning may be required in dusty or off-road conditions.
Expert Maintenance Tips to Keep Your MAF Sensor Clean
Replace the Air Filter Regularly
The MAF sensor is shielded from dust, dirt, and debris by a clean air filter. If you travel in dusty or polluted areas, replace it more frequently or adhere to the manufacturer’s suggested timetable. The sensor’s accuracy may be lowered by contamination from an over-oiled or clogged air filter.
Avoid Over-Oiled Air Filters
To increase filtration, certain aftermarket air filters are extensively oiled. The MAF sensor may become coated with too much oil, leading to erroneous airflow readings. If you utilize oiled filters, use the filter alternatives suggested by the maker of your car or apply simply a thin layer.
Inspect the Intake System for Leaks
Unfiltered air might reach the engine through leaks in the air intake system, bringing pollutants and dust straight to the sensor. Make that the intake path is tight and leak-free by routinely inspecting hoses, clamps, and connections.
Follow Manufacturer Service Schedules
MAF sensor cleaning and inspection are scheduled at predetermined intervals by car manufacturers. Following these schedules preserves engine efficiency, avoids drivability problems, and helps maintain correct sensor readings.
Handle the Sensor with Care
Use caution when removing or cleaning the MAF sensor. Steer clear of using harsh chemicals, twisting wires, and touching the sensor element. Proper handling guarantees dependable long-term performance and lowers the chance of damage.
Keep the Engine Bay Clean
The sensor may eventually become contaminated by dirt, oil residue, and dust in the engine bay. Cleaning the area surrounding the MAF sensor and air intake system on a regular basis can reduce the chance of contamination and increase the sensor’s lifespan.
Conclusion
An easy-to-use yet incredibly powerful tool for preserving engine performance, fuel economy, and sensor longevity is a mass air flow (MAF) sensor cleaning. Frequent cleaning can save you money on needless sensor repairs, guarantee accurate airflow measurements, and avoid drivability problems.
You may prolong the general health of your engine and maintain your MAF sensor’s best performance by using the appropriate cleaning methods, products, and manufacturer recommendations. MAF sensor cleaning is a crucial component of any vehicle care regimen when combined with preventive maintenance and cautious handling.

A tiny but crucial part of the engine cooling system, the car thermostat is vital for controlling engine temperature. It ensures that the engine heats up quickly and maintains an ideal operating temperature by regulating the coolant flow between the engine and the radiator. When an automobile thermostat is operating correctly, it can assist decrease engine wear, increase fuel efficiency, and prevent overheating in a variety of driving situations. Despite its significance, thermostat problems are frequently overlooked until they start to impair a car’s overall performance.
Problems like engine overheating, inconsistent temperature readings, inadequate cabin warmth, and higher fuel consumption can be brought on by a malfunctioning car thermostat. Ignoring these warning indicators could result in expensive repairs and serious engine damage. This thorough tutorial will teach you how to diagnose and repair an automobile thermostat, how it functions, and how much it will cost to fix. This article will give you all the information you require on the car thermostat, regardless of whether you own a car or are an enthusiast for automobiles.

What Is a Car Thermostat?
A car thermostat is a temperature-sensitive valve located within the engine cooling system that regulates the flow of coolant between the engine and the radiator. Its primary function is to help the engine reach its optimal operating temperature quickly and then maintain that temperature during operation.
Unlike the cabin thermostat used for climate control, the car thermostat works automatically based on engine heat and requires no driver input.
When the engine is cold, the thermostat remains closed, preventing coolant from flowing to the radiator. This allows the engine to warm up faster, which improves fuel efficiency and reduces internal engine wear.
The thermostat opens to let coolant flow through the radiator, which dissipates extra heat, when the engine reaches its intended operating temperature, which is normally between 85°C and 105°C (185°F and 221°F). The engine is kept within a safe temperature range by this constant cycle of opening and closing.
Depending on the engine design, modern cars may use mechanical, electronic, or map-controlled thermostats. Modern electronic thermostats are regulated by the engine control unit (ECU) for more accurate temperature regulation, whereas conventional thermostats rely on wax pellets that expand with heat. The car thermostat, regardless of type, is essential to engine performance, pollution control, and long-term dependability.
How Does a Car Thermostat Work?
In order to keep the engine operating within its optimal heat range, the car thermostat controls coolant flow based on engine temperature. In conventional systems, it acts as an automated valve that reacts to temperature variations without requiring any electronic input. This exact control keeps the engine from overheating under typical driving circumstances and enables it to warm up effectively.
The thermostat stays closed when the engine is started cold. As a result, the engine can achieve its working temperature faster because coolant cannot circulate to the radiator. A heat-sensitive component inside the thermostat, usually a pellet filled with wax, expands as the engine heats up. The expansion causes the valve to open when a predetermined temperature is reached, letting coolant to pass through the radiator and dissipate heat. The cycle is repeated as the thermostat gradually closes once again as the coolant cools.
Thermostat Operation in Cold Conditions
The car thermostat stays closed for a longer period of time to assist the engine warm up more quickly in cold weather or on short drives. This guarantees that the car’s heater generates warm air sooner while also increasing fuel efficiency and lowering emissions. The engine would run too cool without this regulated warm-up, which would result in inefficient combustion and more wear.
Thermostat Operation at Normal Engine Temperature
The thermostat constantly modifies its opening to preserve thermal equilibrium at typical operating temperatures. It narrows during lighter driving and widens during high-load situations like interstate driving or uphill climbs. This ongoing modification keeps the engine from overheating while preserving steady efficiency and performance.
Types of Car Thermostats
Car thermostats come in a variety of styles, each intended to satisfy distinct engine specifications and performance objectives. Although controlling engine temperature is the fundamental function of all thermostats, their construction and degree of control differ based on vehicle design, engine technology, and efficiency requirements.
Mechanical Thermostats
In many cars, mechanical thermostats are the most prevalent and conventional kind. They work by using a pellet loaded with wax that expands when heated and contracts when cooled. A valve is forced open by the expanding wax, allowing coolant to pass through the radiator. Because they are dependable, affordable, and don’t need an electronic control, mechanical thermostats are frequently found in older and entry-level cars.
Electronic Thermostats
By collaborating with the engine control unit (ECU), electronic thermostats offer more accurate temperature regulation. Depending on the engine load, driving circumstances, and pollution regulations, these thermostats can change the opening temperature. Particularly in contemporary cars, electronic thermostats help increase fuel economy and lower pollutants by more precisely regulating the ideal engine temperature.
Map-Controlled Thermostats
An improved kind of electronic thermostats is a map-controlled thermostat. They enable the ECU to use preprogrammed temperature maps to dynamically regulate coolant flow. This makes it possible for engines to run cooler under heavy loads to avoid overheating and hotter under light loads for improved efficiency. High-performance and turbocharged engines frequently have these thermostats.
Performance Thermostats
Performance thermostats are made for cars that are used in high-stress situations, including towing or racing. To lessen the chance of overheating, they frequently open at lower temperatures to let coolant circulate earlier. Due to decreased fuel efficiency during warm-up, they might not be the best choice for daily driving, even though they are advantageous for performance applications.
Why the Car Thermostat Is Important
Maintaining engine longevity, performance, and efficiency depends heavily on the car thermostat. Despite its little size, it has a direct impact on the engine’s performance under different driving circumstances. The thermostat makes ensuring the engine operates within its intended thermal range, which is crucial for safe and effective operation, by controlling coolant flow and maintaining engine temperature.
Preventing engine overheating is one of the car thermostat’s main purposes. The thermostat opens to let coolant flow through the radiator, which dissipates extra heat, when the engine reaches high temperatures. Additionally, it keeps the engine from operating too cool, which can be as dangerous. When an engine runs below its ideal temperature, fuel is burned inefficiently, pollutants are raised, and internal wear is increased.
Additionally, a well-functioning car thermostat enhances pollution control and fuel efficiency. For the best combustion, modern engines depend on exact temperature control. The engine control unit (ECU) may enhance the fuel mixture if the thermostat malfunctions, increasing pollutants and fuel consumption. Additionally, over time, this may harm parts like the catalytic converter.
In the end, the car thermostat aids in preventing long-term engine damage. Maintaining a constant temperature eliminates oil pollution, eases the strain on engine parts, and prolongs engine life. Because of this, the thermostat is one of the most crucial—yet frequently disregarded—parts of the car’s cooling system.
Symptoms of a Bad Car Thermostat
Early detection of the signs of a malfunctioning car thermostat can assist save expensive repairs and major engine damage. Any issue with the thermostat can have an immediate impact on the vehicle’s overall performance because it directly regulates engine temperature. Depending on whether the thermostat is jammed open or closed, symptoms may differ, but most cars share a few warning indicators.
Engine Overheating
Engine overheating is one of the most noticeable symptoms of a malfunctioning car thermostat. Engine temperatures will rise quickly if the thermostat is stuck closed, preventing coolant from circulating to the radiator. Steam from the hood, dashboard warning lights, and, in extreme situations, engine shutdown to prevent damage are all possible outcomes of this.
Engine Takes Too Long to Warm Up
The engine may take an abnormally lengthy time to achieve operating temperature if the thermostat is stuck open. This results in slow engine performance and poor fuel efficiency, particularly during cold starts. One of the first signs of thermostat failure is sometimes a delayed warm-up.
Temperature Gauge Fluctuations
Another typical sign is inconsistent or erroneous temperature gauge readings. The engine temperature may fluctuate unpredictably due to a malfunctioning thermostat. The engine control unit may become confused by this discrepancy, which could impair overall drivability.
Poor Fuel Economy
Fuel efficiency can be drastically decreased by a broken automobile thermostat. The ECU increases fuel injection to compensate when the engine runs too cold, which results in higher consumption. This eventually results in increased gasoline prices as well as increased emissions.
Heater Not Working Properly
The thermostat may not be properly enabling coolant to circulate if the heater in your car blows cold or lukewarm air even when the engine is warm. This symptom is frequently disregarded and is especially apparent in chilly weather.
Check Engine Light On
The check engine light in modern cars can be triggered by a malfunctioning thermostat. In addition to storing diagnostic fault codes linked to thermostat performance, sensors can identify anomalous engine temperature or coolant flow.
Car Thermostat Stuck Open vs Stuck Closed
One of two things usually happens when an car thermostat malfunctions: it gets jammed open or stuck closed. Each circumstance has unique risks and has a different impact on engine performance. Knowing the distinction makes it easier to identify issues and assess the potential urgency of repairs.
Symptoms of a Thermostat Stuck Open
Even when the engine is cold, coolant continues to flow through the radiator when a thermostat is left open. The engine finds it difficult to reach its ideal operating temperature as a result. Slow engine warm-up, inefficient fuel use, inadequate cabin warmth, and abnormally low temperature gauge readings are typical symptoms. Long-term operation can increase engine wear and emissions, even if this state is less immediately hazardous.
Symptoms of a Thermostat Stuck Closed
Because it keeps coolant from getting to the radiator, a thermostat that is stuck closed is more dangerous. This quickly raises the engine’s temperature, which frequently results in overheating. High temperature gauge readings, steam coming from under the hood, boiling coolant, and dashboard temperature alerts are all warning indicators. Serious engine damage, such as warped cylinder heads and blown head gaskets, can result from driving with a thermostat stuck closed.
Which Is More Dangerous?
A thermostat that is stuck closed is more dangerous than the other. If overheating is not treated right away, it can rapidly worsen and result in catastrophic engine failure. In order to preserve engine health and efficiency, these issues should be fixed as soon as feasible, even though a thermostat that is stuck open can temporarily allow you to drive.
What Causes Car Thermostat Failure?
Although an automobile thermostat is made to resist high temperatures and continuous use, it is susceptible to failure over time, just like any mechanical part. You may prolong the life of your engine’s cooling system and avoid unplanned malfunctions by being aware of the typical reasons of thermostat failure.
Age and regular wear are two of the most frequent causes of thermostat failure. The internal parts, like the spring mechanism and wax pellet, may deteriorate over time, making it harder for the thermostat to precisely open and close. Although most thermostats are designed to endure for many years, frequent cycles of heating and cooling eventually wear them down.
Coolant pollution is another significant factor. Thermostat movement can be hampered by corrosion, dirt, and mineral deposits carried by outdated or incorrectly mixed coolant. The thermostat may remain open or closed due to these impurities. Coolant accumulation can be avoided and smooth performance can be maintained with routine coolant cleansing and replacement.
Early failure might also result from manufacturing flaws and subpar replacement parts. A thermostat may occasionally malfunction soon after installation as a result of defective components or incorrect calibration. Furthermore, overheating incidents brought on by low coolant levels or radiator problems can harm the thermostat, rendering it unreliable long after the initial problem has been fixed.
Red also: Bad Car Thermostat Symptoms
How to Diagnose a Faulty Car Thermostat
Early detection of a malfunctioning car thermostat can help avoid overheating, inefficient fuel use, and expensive engine repairs. Car owners can do a few simple checks to find any thermostat issues, even though professional diagnostics yield the most reliable results.
Examining the engine temperature gauge is one easy way. Within a few minutes of starting the car, the gauge should progressively increase to the typical working range. The thermostat may get stuck open or closed if the gauge remains abnormally low or rises quickly into the hot zone. Inconsistent thermostat operation may also be indicated by abrupt changes in temperature readings.
Examining the upper radiator pipe is another method of diagnosis. The hose should stay chilly when the engine is cold. The hose should abruptly heat up as the engine warms up and the thermostat opens, signifying coolant flow. The thermostat can be jammed open if the hose heats up right away. The thermostat is probably stuck closed if it stays cool while the engine overheats.
DIY Thermostat Test Methods
The thermostat can be taken out and submerged in hot water for a more direct test. The thermostat should open at its rated temperature as the water warms up. It has to be replaced if it doesn’t open at all or opens only half. Experienced do-it-yourselfers are best suited for this technique.
Professional Diagnostic Methods
Coolant temperature data are tracked in real time by skilled technicians using scan instruments. In order to rule out additional problems like coolant leaks, radiator malfunctions, or malfunctioning temperature sensors, they might also pressure test the cooling system. This guarantees a precise diagnosis prior to thermostat replacement.
Can You Drive with a Bad Car Thermostat?
Even if the symptoms appear mild at first, driving with a malfunctioning car thermostat is not advised. Any malfunction can immediately lead to more serious mechanical issues because the thermostat directly regulates engine temperature. Driving can have a detrimental effect on engine longevity and performance, regardless of whether the thermostat is stuck open or closed.
The engine may run excessively cool if the thermostat is left open. Although this situation would permit short-term drive, partial fuel combustion causes poor fuel economy, increased emissions, and accelerated engine wear. It can also lessen overall driving comfort and cabin heating in cold weather. Long-term use in this condition might harm parts like the catalytic converter and spark plugs.
Much more hazardous is a thermostat that is stuck closed. Rapid engine overheating could lead to blown head gaskets, damaged cylinder heads, or even total engine failure. Driving even a short distance in these situations can result in serious harm. Your car should be stopped right away and evaluated if it exhibits overheating symptoms or temperature warning lights.
Even though a thermostat that is jammed open may allow for limited driving, any suspected thermostat problem should be fixed right away to prevent costly repairs and safety hazards.
How to Replace a Car Thermostat
A basic maintenance procedure that can restore appropriate engine temperature management and avoid overheating is replacing a car thermostat. The core procedures are the same for most cars, while the precise process differs depending on the model. Experienced do-it-yourselfers can complete this task, but for contemporary cars with intricate engine layouts, professional installation is advised.
Make sure the engine is fully cool before starting to prevent burns from hot coolant. The thermostat is typically found close to the engine block, where the top radiator hose attaches. To avoid spills, coolant must be drained or partially removed once the housing has been accessible.
Tools Required for Thermostat Replacement
A socket set, screwdrivers, a gasket scraper, a drain pan, and new coolant are common tools. A torque wrench and a new gasket or sealant may also be necessary for some cars. It is crucial to use the thermostat that is rated appropriately for the operating temperature of your car.
Thermostat Replacement Steps
Typically, the procedure entails disassembling the thermostat housing, removing the old thermostat, cleaning the mounting surface, positioning the new thermostat correctly, and reassembling the housing. The system needs to be thoroughly bled when the coolant is refilled in order to eliminate any air pockets that can lead to overheating.
Common Mistakes to Avoid
Reusing old gaskets, overtightening nuts, installing the thermostat backwards, and neglecting to bleed the cooling system are examples of common mistakes. Temperature issues or coolant leakage can result from any of these errors. Always abide by the coolant recommendations and torque specifications provided by the manufacturer.
Car Thermostat Replacement Cost
When issues occur, replacing an automobile thermostat is a sensible solution because it is typically less expensive than many other engine repairs. The make and model of the car, the type of thermostat, and local labor rates all affect the overall cost.
Cost of Thermostat Part
While electronic or map-controlled thermostats can cost anywhere from $50 to $150 or more, a conventional mechanical car thermostat usually costs between $15 and $50. Depending on the model and use, performance thermostats may cost a little more.
Labor Cost
Depending on the thermostat’s accessibility and the intricacy of the engine design, labor prices often fall between $80 and $250. Certain automobiles need extra parts removed, which takes more time. The replacement typically takes one to two hours.
Replacement Cost by Vehicle Type
-
Economy cars: $100–$200
-
SUVs and trucks: $150–$300
-
Luxury or performance vehicles: $250–$500+
Although doing it yourself can save money, hiring a professional installer guarantees proper cooling system bleeding and averts further problems. Early thermostat replacement can often save thousands of dollars in future engine maintenance.
How Long Does a Car Thermostat Last?
Although a car thermostat is made to survive for many years, the quality of the coolant, driving conditions, and general vehicle maintenance all affect how long it lasts. The normal lifespan of an automobile thermostat is 8 to 10 years, or 80,000 to 100,000 kilometers, though some may break sooner owing to outside circumstances.
The longevity of a thermostat can be shortened by excessive engine loads, frequent exposure to extreme temperatures, and stop-and-go driving. The thermostat may open late, open early, or malfunction completely as the internal parts deteriorate over time. Thermostat failure is frequently gradual rather than abrupt, which makes early signs simple to ignore.
Another significant reason is inadequate cooling system maintenance. Thermostat movement might be hampered by corrosion and debris accumulation brought on by old or contaminated coolant. It’s advised to follow manufacturer coolant replacement schedules and take quick care of cooling system problems in order to extend lifespan. Unexpected failures can also be avoided by proactively replacing the thermostat during significant cooling system maintenance.
How to Maintain Your Car Thermostat
Maintaining your car’s thermostat properly prolongs the life of its cooling system and helps guarantee dependable engine temperature regulation. Although the thermostat itself doesn’t need direct maintenance, keeping the parts around it in good working order is crucial to avoiding early failure.
Regular coolant change is one of the most crucial maintenance procedures. Coolant deteriorates and is polluted with rust and debris over time, which can lead to the thermostat sticking or not working properly. Always use the coolant type that the car manufacturer recommends and adhere to the suggested service intervals.
Another good protective strategy is cleansing the cooling system. Smooth coolant flow is made possible by periodic flushing, which clears the radiator, hoses, and thermostat housing of sediment and scale accumulation. Additionally, overheating incidents that could harm the thermostat should be avoided by regularly monitoring coolant levels and examining hoses for leaks or breaks.
Since the water pump and timing belt are frequently accessed together during major cooling system repairs, it’s also a good idea to replace the thermostat. This proactive strategy lowers labor expenses and lessens the possibility of thermostat failure soon after repairs.
Car Thermostat FAQs
What Temperature Does a Car Thermostat Open?
Depending on the engine type, the majority of car thermostats are made to open between 85°C and 105°C (185°F and 221°F). For the best engine performance, fuel economy, and emissions control, the manufacturer specifies the precise opening temperature.
Can a Bad Thermostat Damage the Engine?
Yes, a malfunctioning car thermostat can seriously harm the engine. Overheating, deformed engine parts, and blown head gaskets might result from a thermostat that is stuck closed. Over time, an open thermostat may increase engine wear and harm emissions-related parts.
How Long Does It Take to Replace a Car Thermostat?
The average car thermostat replacement takes one to two hours. On the other hand, cars with intricate engine configurations or computerized thermostats might take more time.
Is a Car Thermostat Covered Under Warranty?
The age and warranty of the car determine the thermostat coverage. Older cars usually need to be repaired out of pocket, while newer cars might have thermostat replacement covered by powertrain or emissions warranties.
Should I Replace the Thermostat with the Water Pump?
Yes, it is frequently advised to replace the thermostat together with the water pump or timing belt. By doing this, labor expenses can be reduced and future cooling system failures can be avoided because these parts are closely related and frequently accessed together.
Conclusion
A tiny but crucial part, the car thermostat is crucial to preserving engine longevity, performance, and efficiency. The thermostat helps avoid overheating, enhances fuel efficiency, and lessens long-term engine wear by controlling coolant flow and maintaining the engine within its ideal temperature range. If it doesn’t work, even modest symptoms can swiftly develop into major mechanical issues.
You may avoid expensive repairs and unplanned malfunctions by knowing how an automobile thermostat operates, spotting early warning indicators, and doing routine maintenance. Taking care of the thermostat is essential for dependable car performance, whether you’re diagnosing symptoms, scheduling a repair, or managing your cooling system. Your engine will be safeguarded and function at its peak for many years to come with routine inspections and preventative fixes.
-

 Car Maintenance Tips5 months ago
How Long Does It Take To Charge an Electric Car?
-

 Car Maintenance Tips4 months ago
Catalytic Converter Replacement Cost – How Much?
-

 Engine Care6 months ago
Why Are Catalytic Converters So Expensive?
-

 Car Maintenance Tips6 months ago
Oxygen Sensor Replacement Cost
-

 Car Maintenance Tips6 months ago
Camshaft Position Sensor Symptoms
-

 Electric Vehicles5 months ago
Wisconsin Electric Vehicle Charging Tax
-

 Car Maintenance Tips5 months ago
Why Is My Auto AC Blowing Warm Air?
-

 Car Maintenance Tips5 months ago
How To Fix: Steering Assist is Reduced Drive With Care