Engine misfires, rough idling, low fuel efficiency, and difficulty starting your automobile can all be signs of a malfunctioning ignition coil. Your car’s ignition coil is essential because it transforms low battery voltage into the high voltage required to ignite the fuel-air mixture in the engine. Your car just won’t function properly without it.
You can better plan for maintenance or unforeseen repairs if you are aware of how much replacing an ignition coil would cost. The manufacturer, model, kind of coil (OEM or aftermarket), and labor costs all affect the price.
In order to provide you a clear picture of what to anticipate when your ignition coil has to be replaced, we’ll go over the warning indications of a faulty ignition coil, cost considerations, replacement procedures, and advice on how to prolong its life.
An essential component of the ignition system in your car is an ignition coil. Its primary function is to transform the automobile battery’s low voltage into the high voltage required to ignite the fuel-air mixture in the engine’s cylinders. The engine cannot operate effectively without a working ignition coil; it may misfire, stall, or not start at all.
There are several types of ignition coils, each designed for specific engine setups:
Coil-on-plug (COP): Mounted directly on top of each spark plug for precise firing.
Distributor ignition coil: Works with a distributor to send voltage to multiple spark plugs.
Waste spark ignition coil: Sends sparks to two cylinders simultaneously, commonly found in older engines.
A worn-out or failing ignition coil can lead to rough idling, poor fuel efficiency, backfiring, and check engine light activation. Understanding its function helps you recognize problems early and plan for a timely replacement.
Your car’s performance may noticeably suffer from a failed ignition coil. Early detection of these symptoms can prevent more costly engine repairs. Typical signs and symptoms include:
Engine misfires or rough idling: The car may shake or run unevenly at low speeds.
Difficulty starting the engine: Weak or no spark can prevent the engine from starting.
Check Engine Light: A malfunctioning coil often triggers the warning light.
Poor fuel efficiency: Misfires caused by a bad coil waste fuel.
Backfiring or stalling: The engine may hesitate or stall unexpectedly while driving.
It’s obvious that your ignition coil needs to be replaced if you experience any of these symptoms. Ignoring these warning indicators might result in additional engine damage, therefore fixing the issue as soon as possible is crucial.
Factors Affecting Ignition Coil Replacement Cost
The cost of replacing an ignition coil isn’t the same for every car. Several factors influence the final price:
Car make and model: Luxury or high-performance vehicles often require more expensive coils and specialized labor.
Type of ignition coil: Coil-on-plug (COP) systems usually cost more than older distributor-style coils. OEM (Original Equipment Manufacturer) coils are pricier than aftermarket alternatives.
Labor costs: Mechanics’ hourly rates vary by location and complexity of the replacement. Some engines require more time to access coils, increasing labor charges.
Additional parts: Often, spark plugs, ignition wires, or connectors need replacing alongside the coil, adding to the total cost.
Knowing these elements enables you to make an appropriate budget and determine whether expert assistance is required or if a do-it-yourself replacement is viable. You can prevent going over budget and make sure the repair is done effectively by understanding what influences the cost.
The kind of vehicle, the coil itself, and labor costs all affect how much it costs to replace an ignition coil. While high-performance or luxury vehicle coils can cost $200 or more, the average cost of a single ignition coil for most basic cars is between $50 and $150. Depending on how simple it is to access your engine’s coils, labor expenses can range from $50 to $100.
Because each coil needs to be removed and replaced separately, vehicles using coil-on-plug systems may have greater labor expenses. During coil replacement, many mechanics advise changing the spark plugs as well, which can raise the total cost by $20 to $100.
A single ignition coil replacement for an average American car can cost between $100 and $300, while replacing every coil in a multi-cylinder engine could cost up to $400. Although OEM (Original Equipment Manufacturer) coils often provide higher performance and longevity, aftermarket coils are typically less priced.
Additionally, prices may change depending on your region and the car dealership you select. Vehicle owners may successfully budget, prevent unforeseen costs, and make sure their automobile keeps operating smoothly and efficiently by being aware of these price ranges.
Ignition Coil Replacement Process
For some cars, replacing an ignition coil is simple, although the procedure varies based on the engine type and coil design. To guarantee safety, the first step in a do-it-yourself replacement is to disconnect the battery. Next, find the defective coil, which may be linked to a distributor in older engines or on top of the spark plug (coil-on-plug).
After locating the coil, it is unplugged, removed, and replaced with a new one while ensuring that all connections are tight. To guarantee optimal engine efficiency and prevent future misfires, many specialists advise replacing spark plugs simultaneously.
Similar procedures are followed for professional replacement, however because of their expertise and specific equipment, mechanics can complete the task more quickly.
In order to verify the coil’s failure, they also carry out a diagnostic check. If necessary, they may also repair other parts. Each coil usually takes 30 to 60 minutes to complete, while cars with difficult-to-reach engines could take longer.
The mechanic tests the engine after installation to make sure it runs smoothly and ignites properly. Car owners can determine if professional service is safer and more dependable or whether a do-it-yourself replacement is viable by understanding this process.
DIY vs. Professional Replacement
Car owners frequently have to decide whether to hire a professional mechanic or replace the ignition coil themselves. If you already have the tools and a basic understanding of automobiles, doing the replacement yourself can save you money. It takes less than an hour to remove and install a coil on a lot of automobiles.
However, there are hazards associated with do-it-yourself fixes, such as breaking the coil, misconnecting wires, or ignoring underlying engine problems that could lead to future issues.
However, hiring a professional replacement guarantees that the work is completed safely and correctly. In addition to identifying the malfunctioning coil, mechanics possess the expertise, instruments, and diagnostic equipment necessary to detect any associated problems, such as damaged spark plugs or ignition wires.
Although labor costs may increase the cost, warranty coverage and peace of mind frequently make up for the additional expense.
The choice ultimately comes down to how comfortable you are with auto repairs, how complicated your engine is, and whether you want to reduce the possibility of errors that could result in later, more expensive repairs.
In addition to increasing engine performance, extending the life of your ignition coil can help you avoid expensive replacements. Regular maintenance, such as examining the ignition system during routine service and changing spark plugs before they wear out because worn or damaged plugs impose additional strain on the coil, is one of the most efficient methods.
Avoiding engine overheating is also crucial since too much heat can harm the internal parts of the coil. Consistent performance and a lower chance of coil failure are guaranteed when you use high-quality spark plugs and wires that are suitable with your car. Additionally, corrosion or electrical shorts that could impair the coil’s performance should be avoided by keeping your engine clear of debris and clean.
You may greatly extend the life of your ignition coil, lower the chance of unplanned breakdowns, and maintain ideal fuel efficiency by adhering to these straightforward but efficient procedures. Your car will operate smoothly and save you money on repairs over time with regular inspections and prompt replacements of related parts.
Common Questions About Ignition Coil Replacement
When it comes to replacing an ignition coil, many automobile owners have questions. Knowing the answers can help avoid errors and needless expenses. How frequently ignition coils should be changed is one frequently asked question. Although the lifespan of coils varies according on driving circumstances and maintenance practices, they can last anywhere from 60,000 to 100,000 miles.
How much does it cost to replace an ignition coil?
The type of coil, labor costs, and your vehicle all affect the price. A single coil replacement typically costs between $100 to $300, while replacing every coil in a multi-cylinder engine can cost up to $400.
How do I know if my ignition coil is bad?
Engine misfires, rough idling, low fuel efficiency, backfiring, and the check engine light going on are typical indicators of a malfunctioning ignition coil.
Can I replace an ignition coil myself?
Yes, for many vehicles, replacing a coil is feasible for DIY enthusiasts with basic tools and automotive knowledge. However, some engines are more complex, and professional replacement may be safer.
How long do ignition coils last?
The average lifespan of an ignition coil is between 60,000 and 100,000 miles, but this might vary depending on driving circumstances, upkeep, and the caliber of associated parts like spark plugs.
Should I replace all ignition coils at once?
Usually, only the defective coil needs to be replaced. However, replacing every coil will assist guarantee constant engine performance if your car has a high mileage or if several coils are deteriorated.
Are aftermarket ignition coils safe?
In general, high-quality aftermarket coils are affordable and safe. OEM coils, on the other hand, are typically more dependable and made especially for your car.
Does replacing an ignition coil improve performance?
Yes, a new ignition coil fixes misfires, increases fuel efficiency, lowers pollutants, and improves engine smoothness by restoring optimum spark delivery.
What factors affect ignition coil replacement cost?
The type of coil, labor costs, automobile make and model, and the necessity to replace extra parts like spark plugs or ignition wires all affect the cost.
Conclusion
To keep your car operating smoothly and effectively, you must replace a defective ignition coil. A failed ignition coil can result in engine misfires, low fuel efficiency, and trouble starting. Ignition coils are essential for providing the spark required for optimal engine combustion.
You may make wise judgments and prevent unforeseen maintenance costs by being aware of the typical replacement cost, the factors that influence pricing, and the warning signals of a failing coil. Your comfort level, available tools, and the intricacy of your engine will determine whether you go for a professional service or a do-it-yourself replacement.
You may prolong the life of your ignition coil and avoid future expensive repairs by doing routine maintenance, such as inspecting spark plugs and wires. You can keep your car dependable, safe, and fuel-efficient by being proactive and taking care of problems as soon as they arise.
Understanding the cost and procedure of ignition coil replacement gives you the ability to take charge of your car’s performance, whether you are budgeting for replacement or scheduling preventative maintenance.
Although it might not be the first thing drivers consider when maintaining their car, a fuel pump is one of the most important parts that keeps the engine operating efficiently. Delivering fuel from the tank to the engine at the proper pressure is its straightforward but crucial task. The symptoms of a failing fuel pump can rapidly worsen, from rough idling and sputtering to total engine shutdown, frequently leaving drivers stranded or with unanticipated repair costs.
Whether you’re dealing with early warning signals or getting ready for periodic maintenance, it’s critical for any car owner to understand the cost of replacing their fuel pump. The type of vehicle, the quality of the parts, and the location of the repair can all have a significant impact on the cost. It’s simple to overpay or consent to needless services if you don’t have the correct information.
We go over all you need to know about fuel pump replacement costs in 2026 in this extensive guide. You will discover the normal cost of the repair, the variables that affect price, typical indicators of pump failure, how technicians identify the problem, and useful advice to help you save money. This resource, which is supported by real-world facts and professional insights, is intended to provide you with confidence and clarity before you visit the repair shop.
What Does a Fuel Pump Do?
One of the most crucial parts of your car’s gasoline distribution system is the fuel pump. Its main function is to transfer gasoline at the exact pressure required for optimal combustion from the gas tank to the engine. Your engine cannot start, accelerate, or run consistently without fuel coming from a fuel pump that is operating properly.
Electric fuel pumps, which are usually found inside the fuel tank, are essential to modern automobiles. In order to support the sophisticated fuel injection systems of today, these pumps maintain constant fuel pressure.
Mechanical gasoline pumps installed on the engine block may be seen in older cars, particularly those with carbureted engines. Electric pumps are more durable and efficient than mechanical pumps, but they are also more complicated and expensive to maintain.
A well-functioning fuel pump ensures:
Proper engine performance
Stable fuel pressure during acceleration and high-speed driving
Efficient fuel combustion
Smooth idling and consistent power delivery
The pressure decreases or fluctuates when a fuel pump begins to malfunction. Common problems including hard starting, slow acceleration, sporadic stalling, and even total engine shutdown result from this.
Knowing how the fuel pump functions is crucial because it enables you to see early warning indicators, assess whether a replacement is required, and comprehend why prices might differ significantly based on the kind of pump and where it is located in your car.
Depending on your car, the kind of pump it uses, and where you want the service done, the cost of replacing your fuel pump might vary greatly. Most drivers should budget between $400 and $1,500 for a full fuel pump replacement. This covers the price of the component as well as the labor needed to install it.
Due to their complexity and placement inside the fuel tank, electric fuel pumps—which are frequently found in contemporary cars—tend to be more costly. In certain vehicles, changing the pump necessitates completely removing the gasoline tank, which adds to the expense and work time. Usually present in older or carbureted vehicles, mechanical pumps are easier to replace and normally cost substantially less.
Average Fuel Pump Replacement Cost
For a typical passenger vehicle, here’s what you can expect:
Parts: $150 – $800
Labor: $150 – $700
Total Cost: $400 – $1,500
On the top end of the spectrum are luxury cars, trucks with bigger fuel tanks, and automobiles that need to have their tanks removed. Older models and small economy cars, on the other hand, usually cost far less.
Parts vs. Labor Cost Breakdown
A fuel pump replacement isn’t just about swapping out a single component. Depending on the vehicle, the job may involve:
Replacing the fuel pump assembly
Installing a new fuel filter (if separate)
Inspecting or replacing fuel lines
Cleaning the fuel tank
Resetting fuel pressure or running diagnostics
The largest expense is frequently labor, particularly when the pump is housed inside the tank. Repair businesses may work for one and a half to four hours.
Estimated Price Range by Vehicle Category
Here’s a general idea of what different types of vehicles may cost:
Economy cars: $350 – $700
Sedans: $450 – $900
SUVs/Crossovers: $600 – $1,200
Pickup trucks: $700 – $1,500
Luxury vehicles: $900 – $2,000+
You can compare service alternatives, assess repair shop quotations more effectively, and be ready for any unexpected costs that may arise if more parts need to be replaced if you comprehend the cost breakdown.
Fuel Pump Replacement Cost by Vehicle Type
The cost of replacing a fuel pump varies depending on the vehicle. The final cost may vary depending on the gasoline system’s design, tank size, accessibility, and pump type. To help you understand where your car might lie on the pricing range, a thorough overview of average expenditures depending on several vehicle types is provided below.
Economy Cars
Estimated Cost: $350 – $700
Smaller tanks and simpler fuel systems are typical with economy cars like the Ford Fiesta, Toyota Corolla, Hyundai Elantra, and Honda Civic. Because their electric fuel pumps are simple to access and replace, labor costs are reduced. Aftermarket pump choices are commonly available, and parts are generally reasonably priced.
Why economy cars cost less:
Smaller fuel pump assemblies
Easy tank access
Lower parts cost
Faster installation time
Mid-Size & Full-Size Sedans
Estimated Cost: $450 – $900
More sophisticated fuel injection systems are typically found in sedans, and some models use fuel pump modules that are integrated with sensors or regulators. The cost of parts may increase as a result of these additional components. Unless tank removal is necessary, labor is still moderate.
Common examples: Honda Accord, Toyota Camry, Nissan Altima, Chevrolet Malibu.
SUVs & Crossovers
Estimated Cost: $600 – $1,200
SUVs frequently have more intricate layouts, larger fuel tanks, and higher-pressure pump systems. Parts and labor expenses rise as a result. An additional one to two labor hours are required in many SUVs because the fuel tank must be lowered in order to access the pump.
Why SUV costs are higher:
Bigger tanks = longer labor
More robust high-pressure pumps
Limited access in compact SUV designs
Pickup Trucks
Estimated Cost: $700 – $1,500
Fuel pump replacement expenses for pickup vehicles, especially full-size versions, can be among the highest. They frequently need more labor because to their enormous gasoline tanks, heavy-duty fuel systems, and multilayer components. Additionally, trucks may have sophisticated pump modules that are more expensive to replace.
Common examples: Ford F-Series, RAM 1500, Chevy Silverado, Toyota Tacoma
Hybrid & Electric-Assisted Vehicles
Estimated Cost: $800 – $1,600+
Fuel pumps are still used by internal combustion engines in hybrid cars. These pumps, however, are frequently extremely specialized and designed to meet various pressure needs. Replacement parts are therefore typically more costly.
Examples: Toyota Prius, Honda Insight, Hyundai Ioniq hybrids
Why hybrids cost more:
Complex dual-powertrain systems
Integrated sensors
Limited aftermarket parts availability
Signs Your Fuel Pump Is Failing
You can avoid unplanned breakdowns and expensive towing costs by being aware of the early warning indicators of a faulty fuel pump. Since the fuel pump is in charge of providing the engine with a constant fuel supply, even little malfunctions might result in noticeable performance concerns. Early detection of these indications enables you to plan repairs before the pump totally fails.
The most typical indicators that your fuel pump might be malfunctioning are listed below.
Engine Sputtering at High Speeds
Engine sputtering at higher speeds is one of the first and most typical symptoms. This occurs when the engine briefly loses power due to the fuel pump’s inability to provide steady pressure. A failing pump is most likely the culprit if the issue gets worse over time.
Difficulty Starting the Vehicle
Your automobile may not be getting enough fuel from the fuel pump if it cranks but has trouble starting. A failed pump typically results in longer-than-normal cranking followed by poor starts, while weak batteries or defective spark plugs can produce similar problems.
Loss of Power During Acceleration
When there is a lot of demand, like accelerating from a stop, climbing a slope, or hauling large loads, a failing pump may choke. Inconsistent fuel pressure may be the cause if you experience your car lagging, hesitating, or suddenly losing power in these situations.
Frequent Stalling
Random stalling is a clear sign of problems with fuel supply, particularly while the engine is warm. Before it totally ceases operating, a failing gasoline pump may experience sporadic failures. It’s critical to get your car evaluated right away if it stalls frequently and without notice.
Poor Fuel Efficiency
The engine may use more fuel than is necessary if the fuel pump isn’t properly controlling the fuel pressure. A discernible decrease in miles per gallon (MPG) could indicate that the pump is providing fuel inefficiently or working harder than it should.
Engine Misfires
Misfires can result from low or irregular fuel pressure, particularly when accelerating. Ignition problems can cause misfires, but when paired with other fuel-related symptoms, a failed pump is a common culprit.
Engine Overheating
In certain cars, the engine may overheat due to a broken fuel pump, particularly if the pump depends on fuel for lubrication and cooling. Pump failure is frequently indicated by overheating along with sputtering or halting.
Whining or Humming Noise From the Fuel Tank
One of the most prominent signs is a loud whining, whirring, or buzzing sound originating from close to the gasoline tank. A loud, continuous whine typically indicates that the pump is under stress or is about to fail, albeit some noise is normal.
Should You Replace or Repair a Fuel Pump?
When a Repair Might Be Possible
Sometimes a fuel pump issue doesn’t call for a complete replacement. Sometimes electrical problems like a malfunctioning relay, blown fuse, or broken wire can be fixed without actually touching the pump. If there are small internal obstructions, older mechanical pumps may also need to be cleaned. Furthermore, a malfunctioning external pressure regulator or a clogged fuel filter might simulate pump failure; fixing these problems alone may restore appropriate gasoline delivery.
Why Replacement Is Often the Best Option
Electric in-tank fuel pumps, which are typically sealed components integrated into a fuel pump module, are used in modern automobiles. Because of the sensors, regulators, and internal filters in these modules, repairs may be challenging or impossible. A complete replacement is usually required when the pump’s motor weakens, the pressure falls below manufacturer requirements, or there are loud whining noises. Replacing the module guarantees that every part works correctly and stops recurring malfunctions.
Long-Term Benefits of Replacement
More dependability and long-term value are obtained by replacing the fuel pump. While repairs frequently come with no guarantees, new pumps are made to survive for many years and are covered by warranties. It is more economical to replace the entire assembly at once rather than fix a malfunctioning part and then have to do it again because reaching the pump typically necessitates removing the gasoline tank.
Risks of Delaying Replacement
Delaying an essential replacement can cause major issues. It can be hazardous to drive when a gasoline pump fails since it might result in abrupt stalling, engine roughness, or total shutdown. If ignored, it could also put additional stress on the fuel injectors and ignition system, raising the expense of repairs.
Making the Right Decision
The safest and best course of action for the majority of drivers is to replace the fuel pump. Installing a high-quality replacement when diagnostic testing reveals that the pump is malfunctioning guarantees steady fuel delivery, prevents further malfunctions, and gives drivers piece of mind while driving.
DIY Fuel Pump Replacement: Should You Try It?
Although it may seem like a tempting method to save money, replacing a fuel pump yourself is a difficult task. Modern electric in-tank fuel pumps in particular are complicated, and incorrect installation can result in major safety issues, engine damage, or even fire hazards. You may determine whether doing it yourself is feasible or if hiring a professional mechanic is a safer option by being aware of the hazards, difficulties, and equipment needed.
Skill Level Required
A moderate to advanced degree of vehicle repair experience is necessary for do-it-yourself fuel pump replacement. You should know how to work with electrical connections, engine parts, and pressurized fuel systems. Even minor errors, like breaking a wiring harness or not correctly sealing the gasoline tank, can lead to expensive repairs or hazardous circumstances. Professional installation is strongly advised for people without any prior automotive experience.
Tools and Equipment Needed
Specialized tools are usually needed to replace a fuel pump. A fuel line disconnect kit, socket and wrench sets, jack stands or a lift, screwdrivers, and occasionally a fuel tank support strap are examples of common gear. Because gasoline is volatile, safety gear including gloves and eye protection are crucial. The procedure might become risky and time-consuming without the right equipment.
Safety Risks
Fuel systems use combustible liquids and run under pressure. Chemical exposure, fire, and fuel spillage can result from improper handling. Furthermore, contemporary fuel pumps are frequently found inside fuel tanks, necessitating the safe lowering or removal of the tank. The tank, the pump assembly, or other parts of the gasoline system could be harmed by improper handling during this procedure.
Vehicles That Are More DIY-Friendly
Some older cars with external access panels or mechanical gasoline pumps are better suited for do-it-yourself replacements. Sometimes skilled enthusiasts can safely service small automobiles with accessible pump assemblies and smaller gasoline tanks. The majority of contemporary automobiles, particularly SUVs, trucks, and high-end vehicles with in-tank electric pumps, are better left to experts.
Cost Savings vs. Risks
Although replacing something yourself can save money on labor, if you make a mistake during installation, the cost will be more than if you hire a professional. Incorrect installation may also negate warranty coverage for aftermarket items. Paying a reputable mechanic guarantees that the pump is installed properly, safely, and under warranty for the majority of drivers.
How Long Does a Fuel Pump Last?
Planning maintenance, avoiding unplanned failures, and budgeting for replacement costs all depend on understanding a fuel pump’s usual lifespan. Although gasoline pumps are made to survive, a number of factors can affect how long they last and when replacement is required.
Although some may fail sooner due to wear or poor maintenance, the majority of fuel pumps in modern cars endure between 100,000 and 200,000 miles. Because they run more effectively and are continuously lubricated and cooled by gasoline, electric in-tank pumps typically last longer than earlier mechanical pumps. Pumps are susceptible to deterioration and damage over time, though.
A fuel pump’s lifespan is influenced by a number of things. A significant factor is fuel quality; poor or tainted fuel can introduce debris that clogs the pump, erodes internal parts, and lowers overall performance. Driving habits are also important because they can put additional strain on the pump, such as frequent short journeys, excessive towing, or repetitive acceleration under load. Because fuel serves as a coolant for the pump motor, vehicles that frequently run on low fuel levels may also suffer from premature pump wear.
Fuel pump life can be greatly increased with preventive maintenance. It is possible to lessen the load on the pump and avoid contamination by using high-quality fuel, keeping the tank sufficiently full, and changing the fuel filters on a regular basis. Additionally, observing early warning indicators—like sputtering, trouble starting, or strange noises—enables prompt investigation prior to a complete breakdown.
Drivers can avoid unexpected repairs and budget for replacement expenses by knowing how long fuel pumps last. We’ll look at ways to reduce the cost of replacing a fuel pump in the next section, including advice on labor, parts, and preventative measures.
How to Save Money on Fuel Pump Replacement
Although replacing a fuel pump might be expensive, there are a number of ways to cut costs without sacrificing quality or safety. You may cut expenses and prevent needless repairs by properly preparing and being aware of your options.
Compare Multiple Quotes
Getting quotes from many service providers is one of the easiest methods to save money. Part prices might fluctuate greatly, and labor rates are frequently charged differently by dealerships, independent mechanics, and mobile services. You can find the ideal deal between price and service quality by comparing several quotations. Ask about extra costs for gasoline filters, gaskets, or diagnostic services, and always make sure the quotation includes both parts and labor.
Consider Aftermarket Parts
While still offering dependable performance, aftermarket gasoline pumps are frequently less expensive than OEM (Original Equipment Manufacturer) components. Reputable aftermarket companies can provide a more affordable option, particularly for mid-range or economy cars. However, it’s crucial to stay away from subpar, unreliable parts that could break down too soon and result in extra expenses.
Practice Preventive Maintenance
Your fuel pump’s lifespan can be increased and expensive replacements can be avoided with preventive maintenance. The pump is less stressed when fuel filters are changed on a regular basis, clean, premium fuel is used, and the tank is kept almost empty. By keeping an eye out for early warning indicators like sputtering, strange noises, or trouble starting, you can take care of issues before they get out of hand and save money and worry.
Leverage Discounts and Warranties
For fuel system maintenance, many repair shops provide coupons, promotions, or package packages that can drastically lower labor and part expenses. A gasoline pump replacement may also be partially or completely covered by extended vehicle coverage, manufacturer warranties, or service agreements. Before committing to a repair, always check your warranty alternatives as this might result in significant savings.
Frequently Asked Questions About Fuel Pump Replacement
Can I drive with a failing fuel pump?
It is dangerous to drive when the fuel pump is malfunctioning. Engine stalling, sputtering, or total shutdown might be caused by a weak or erratic pump. Short excursions could be tolerable, but long drives can leave you stranded or further harm the engine and fuel system. As soon as symptoms start to show, it is preferable to have the pump inspected.
How long does a fuel pump replacement take?
The type of pump and your car will determine how long it takes. A replacement can take 1.5 to 3 hours for the majority of cheap cars. It could take four to five hours for cars with huge fuel tanks, intricate layouts, or in-tank pumps. The service time may be prolonged by additional tasks like cleaning the tank or changing the gasoline filters.
How much does a fuel pump replacement cost?
Fuel pump replacement typically costs between $400 and $1,500, including labor and parts. SUVs, trucks, luxury cars, and hybrid vehicles are typically more expensive than economy cars and older cars. The intricacy of the fuel system, labor rates, and the quality of the parts (OEM vs. aftermarket) all affect prices.
What causes fuel pumps to fail?
There are several reasons why fuel pumps fail. Common causes include clogged filters, electrical problems, operating the tank constantly close to empty, tainted fuel, and wear and tear over time. Pump wear can also be accelerated by difficult driving circumstances, such as pulling large loads or making many short excursions.
Will my warranty cover fuel pump replacement?
Coverage is determined by the warranty on your car. Fuel pump failures may be covered by powertrain or fuel system warranties found on many new cars. There may also be extended warranties or service agreements. Before paying for repairs, it’s crucial to check your warranty documents to make sure you are covered.
How can I tell if it’s the fuel pump or fuel filter?
Stalling, sluggish acceleration, and trouble starting are signs of both a broken pump and a blocked fuel filter. In order to identify the underlying problem, mechanics typically test the fuel pressure and examine both parts. If the pump is still operating correctly, replacing the filter first is frequently less expensive and might resolve the issue.
Can dirty fuel damage the fuel pump?
Yes, Contaminated fuel, dirt, and debris can block the pump, deteriorate internal parts, and lower efficiency. The pump can be protected and its lifespan increased by using high-quality fuel, changing filters on a regular basis, and avoiding low fuel levels.
Is it worth repairing a fuel pump instead of replacing it?
It is rarely advised to fix a fuel pump in the majority of contemporary automobiles. Since electric in-tank pumps are sealed devices, their full functionality might not be restored by partial repairs. Replacement guarantees continuous gasoline flow, warranty coverage, and long-term dependability.
Are fuel pumps different for hybrid vehicles?
Fuel pumps continue to power the combustion engine in hybrid cars. However, these pumps are more costly and complicated since they are frequently designed specifically to operate with dual-powertrain systems. Only qualified personnel with experience with hybrid fuel systems should carry out repairs or replacements.
Conclusion
Every car owner must be aware of the costs associated with replacing their fuel pump. Knowing what to anticipate can help save time and money, from spotting early warning signs and diagnosing issues to deciding between replacement and repair.
Costs vary based on the type of vehicle, labor costs, and quality of the parts, but you can prolong the life of your pump and avoid unplanned breakdowns by taking preventive steps like using clean fuel, maintaining your fuel filter on a regular basis, and resolving problems early. You can guarantee a dependable fuel system without going over budget by comparing prices, taking into account aftermarket parts, and selecting the best service provider.
Engine performance depends on your gasoline pump, and by making wise choices now, you can maintain your car’s smooth operation for many years to come.
Maintaining the smooth and effective operation of your engine depends heavily on a Mass Air Flow (MAF) sensor cleaner. The engine control unit (ECU), which modifies fuel delivery for ideal combustion, receives data from the mass air flow sensor on the amount of air entering the engine. Inaccurate readings may result from the sensor becoming coated over time by dust, oil vapors, and debris from the air intake system.
Drivers may experience symptoms like rough idling, poor acceleration, decreased fuel economy, or even a check engine light when this occurs. Accurate airflow readings can be restored without harming the sensitive sensor components by using a specialized mass air flow sensor cleaning.
Cleaning the MAF sensor is one of the easiest and least expensive preventive measures a car owner can take, according to practical automotive repair expertise. In contrast to replacing the sensor, which can be costly, appropriate cleaning using a sensor-safe cleaner frequently fixes performance problems in a matter of minutes. But not all cleaners are appropriate, and treating the sensor incorrectly can cause irreversible damage.
In order to assist you understand when, why, and how to use a mass air flow sensor cleaner effectively, this guide was designed. It combines practical hands-on knowledge, manufacturer-recommended practices, and safety-focused advice.
What Is a Mass Air Flow Sensor?
An essential part of engine control, a mass air flow (MAF) sensor measures the precise amount of air entering the engine. The engine control unit (ECU) receives this data in real time and uses it to determine the proper air-to-fuel ratio for effective combustion. The engine runs smoothly, produces more power, and maintains maximum fuel efficiency when the ECU receives accurate airflow data. Even little errors from the MAF sensor can have a significant impact on performance because modern engines rely so heavily on accurate sensor data.
Hot wire or hot film MAF sensors are used in the majority of automobiles. These incredibly sensitive sensors are made to measure temperature variations brought on by entering air in order to identify changes in airflow. The sensor is continuously exposed to dust, oil residue, and other impurities because it is situated immediately in the intake air stream. Regular maintenance and appropriate cleaning are crucial for preserving engine dependability and emissions compliance since these deposits eventually interfere with airflow readings.
How a Mass Air Flow Sensor Works
The volume and density of air entering the engine through the intake system are precisely measured by the mass air flow sensor. The sensor in the majority of contemporary cars has a thin heated wire or film element. This element is cooled as air passes over it.
The amount of electrical current required to maintain the element’s temperature is then determined by the sensor. The sensor is named a mass air flow sensor instead of just an airflow meter because the mass of air entering the engine directly correlates with the amount of current needed.
The engine control unit (ECU) receives this airflow data continually and uses it to modify the timing and amount of fuel injection. The ECU can maintain a perfect air-fuel mixture when the MAF sensor is clean, guaranteeing smooth acceleration, steady idling, and economical fuel use.
Nevertheless, airflow values become erroneous when impurities coat the sensor element, leading the ECU to supply either too much or too little fuel. Drivability problems, higher emissions, and decreased engine performance are frequently caused by this imbalance, underscoring the significance of thorough cleaning using a specialized mass air flow sensor cleaner.
Where the Mass Air Flow Sensor Is Located
Usually found in the air intake system, the mass air flow sensor is situated between the throttle body and the air filter housing. It is one of the simpler sensors to reach for cleaning and inspection because it is typically installed directly to the intake duct or air filter box in cars.
Depending on the vehicle’s design, the sensor enclosure is fastened with screws or clamps and typically has an electrical connector attached to it. The MAF sensor is continuously exposed to airborne particles and pollutants since it is in the direct path of entering air.
The function is the similar for the majority of gasoline and diesel vehicles, while the precise location may differ significantly depending on the manufacturer and engine configuration.
When the hood is opened and the air intake pipe is traced from the air filter in popular models from Toyota, Honda, Ford, Nissan, and comparable brands, the MAF sensor is easily visible. Before doing any cleaning, it is crucial to understand the precise placement because misidentifying it with adjacent sensors, like the intake air temperature sensor, can result in damage or incorrect maintenance.
A mass air flow sensor cleaner is a specially made spray that is intended to safely remove carbon buildup, oil residue, and grime from the sensitive sensing components inside a MAF sensor. MAF sensor cleaners are non-conductive, quickly evaporate, and leave no residue, in contrast to general-purpose cleaners. This is crucial since the sensor’s interior parts are highly sensitive and can sustain irreversible damage from physical contact or harsh chemicals. Using a specialized cleaner guarantees that the sensor is thoroughly cleaned without compromising its longevity or accuracy.
From the perspective of automotive maintenance, both professional mechanics and car manufacturers advocate mass air flow sensor cleaning as a sensor-safe alternative. It is far safer than alternatives like brake or carburetor cleaning because it is designed specifically for electronic components exposed to airflow.
The significance of using the proper MAF sensor cleaner as part of regular automotive maintenance is emphasized by the fact that it helps restore accurate airflow readings, enhance engine efficiency, and avoid needless sensor replacement.
How Mass Air Flow Sensor Cleaner Works
Contaminants that build up on the sensitive sensing components of the sensor over time are broken down and dissolved by mass air flow sensor cleaning. The hot wire or hot film inside the MAF sensor may become coated by tiny dust particles, oil vapors from the crankcase ventilation system, and residue from aftermarket air filters as air flows through the intake system. In order to prevent harming the delicate sensor components, the cleanser quickly penetrates these deposits and takes them away when sprayed.
In order to prevent any residue from interfering with electrical signals or airflow measurements, the recipe is made to evaporate swiftly and completely. The sensor can measure entering air accurately once again and transmit exact data to the engine control unit (ECU) once the impurities have been eliminated and it has dried.
As a result, the engine runs more smoothly, fuel efficiency increases, and optimum fuel delivery is restored. Mass air flow sensor cleaner is one of the safest and most efficient maintenance options for resolving airflow-related performance concerns because of its non-invasive cleaning action.
Signs Your Mass Air Flow Sensor Needs Cleaning
As impurities accumulate on the sensor, these symptoms frequently appear gradually. By taking care of them early on using an appropriate mass air flow sensor cleaner, more drivability problems and expensive repairs can be avoided.
Rough or unstable engine idle
Hesitation or jerking during acceleration
Reduced engine power and sluggish throttle response
Poor fuel economy despite normal driving habits
Engine stalling, especially at low speeds or when stopping
Check engine light illuminated with common MAF-related codes (P0100, P0101, P0102, P0103, P0104)
Difficulty starting the engine in some cases
Benefits of Using a Mass Air Flow Sensor Cleaner
Restores Accurate Air-Fuel Ratio
The engine control unit (ECU) obtains accurate airflow data when the MAF sensor is clean. This makes it possible for the ECU to supply the right amount of fuel for combustion, which improves engine performance overall and produces smoother idling and steady acceleration. Inaccurate readings from a dirty sensor might result in misfires, hesitation, or rough idle.
Improves Engine Performance
The engine reacts to throttle input more efficiently when precise airflow data are maintained. Even in older cars, drivers frequently observe improved acceleration, faster throttle response, and steady power delivery. By cleaning the sensor, performance problems are avoided before they become more serious and require expensive repairs.
Increases Fuel Efficiency
The engine may overfuel or underfuel as a result of a dirty MAF sensor, increasing fuel consumption. Frequent cleaning improves fuel distribution, saving you money at the pump and cutting down on needless fuel waste.
Reduces Emissions
Efficient combustion, which reduces hazardous exhaust emissions, is supported by accurate airflow measurement. This lessens your environmental impact while also assisting your car in passing emission tests.
Extends Sensor Lifespan
By using a specific MAF sensor cleaner, accumulation that can harm the sensor irreversibly is avoided. Frequent maintenance prolongs the MAF sensor’s life and prevents costly replacements.
Supports Preventive Maintenance
As part of regular maintenance, cleaning the MAF sensor keeps your engine and intake system in good working order. Preventive maintenance keeps the car operating smoothly, lowers the chance of engine problems, and guarantees long-term dependability.
How to Clean a Mass Air Flow Sensor (Step-by-Step Guide)
1. Gather the Necessary Tools and Materials
Before starting, ensure you have everything you need:
MAF sensor cleaner spray (never use carb or brake cleaner)
Screwdriver or socket set (depending on your sensor’s mounting)
Gloves and safety glasses to protect your hands and eyes
Clean lint-free cloth (optional, for wiping around the sensor housing)
2. Prepare Your Vehicle
Turn off the engine and disconnect the battery to prevent electrical short circuits.
Locate the MAF sensor between the air filter box and the throttle body.
3. Remove the MAF Sensor
Carefully unplug the electrical connector from the sensor.
Unscrew or unclamp the sensor from the intake duct.
Avoid touching the sensor element directly, as it is extremely delicate.
4. Apply the MAF Sensor Cleaner
Hold the sensor over a clean surface.
Spray the MAF sensor cleaner generously on the sensor wires or film.
Avoid using cloth or brushes, which can damage the sensor.
Spray all accessible surfaces lightly to remove dirt, oil, and debris.
5. Let the Sensor Dry
Allow the sensor to air dry completely for at least 10–15 minutes.
Ensure there is no moisture or cleaner residue before reinstalling.
6. Reinstall the MAF Sensor
Carefully place the sensor back into the intake duct and secure screws or clamps.
Reconnect the electrical connector.
Reconnect the battery and start the engine to ensure proper operation.
7. Recommended Cleaning Interval
For most vehicles, clean the MAF sensor every 15,000–30,000 miles, or more frequently in dusty conditions.
Regular maintenance prevents drivability issues and extends the sensor’s lifespan.
Best Mass Air Flow Sensor Cleaners — Pros and Cons
Both expert mechanics and do-it-yourself car enthusiasts strongly recommend CRC Mass Air Flow Sensor Cleaner. Delicate sensor components are carefully cleaned by its non-residue composition, which evaporates fast to prevent any residual moisture from interfering with readings. The cleaner is perfect for routine maintenance because it effectively removes carbon buildup, dust, and oil.
Pros:
Gentle on sensitive sensor components
Fast-drying formula
Affordable and widely available
Cons:
Spray nozzle can be broad, making precise application tricky
May require multiple applications for heavily contaminated sensors
Automotive experts use Liqui Moly Air Flow Sensor Cleaner, a high-end German product. Its potent yet sensor-safe solution effectively eliminates tenacious deposits without causing harm to the sensor. It provides dependable results for extensive maintenance and works especially well on severely clogged MAF sensors.
Pros:
Highly effective on heavy buildup
Sensor-safe and non-residue formula
Trusted by professional mechanics
Cons:
Higher cost compared to standard options
Less readily available in some regions, may require online purchase
Convenience and sensor-safe chemicals are combined in the WD-40 Specialist Mass Air Flow Cleaner for efficient cleaning. It is a good option for regular maintenance because of its quick-drying formula and easy-to-use spray nozzle, which enable accurate application. Most automobile owners can afford it because it strikes a compromise between price and performance.
Pros:
Quick-drying, residue-free formula
Easy-to-use spray head for precise application
Affordable and accessible
Cons:
Less aggressive on severe buildup
May require repeated sprays for heavily contaminated sensors
Common Mistakes to Avoid When Cleaning a MAF Sensor
Touching the Sensor Element
A MAF sensor’s wires or film are incredibly fragile. The element may be bent, broken, or otherwise damaged by physical contact, which could lead to erroneous airflow readings or total sensor failure. When cleaning, always use a cleaner that is safe for sensors and keep your hands away from the sensor.
Using Compressed Air
Blasting the sensor with compressed air might irreversibly harm its small wires or film, even though it might seem like a quick fix. High-pressure air can distort or shatter the sensor elements in MAF sensors, which are made to monitor airflow precisely.
Using the Wrong Cleaner
Although brake or carburetor cleaners may seem practical, they contain strong chemicals that might corrode or harm the sensitive parts of the sensor. Always use a non-conductive, residue-free mass air flow sensor cleaning.
Reinstalling Before the Sensor is Dry
Before reinstalling, the sensor needs to be totally dry after cleaning. Installing a wet sensor may result in misfires, short circuits, or erroneous readings. Give it at least ten to fifteen minutes to air dry in a hygienic setting.
Ignoring Manufacturer Guidelines
There are particular maintenance guidelines for each car. Ignoring these could result in warranties being void or inefficient cleaning. Before trying to clean the sensor, always refer to the manufacturer’s instructions or owner’s handbook.
Is Mass Air Flow Sensor Cleaner Safe for All Cars?
Gasoline vs. Diesel Engines
As long as the product is marked “sensor-safe,” mass air flow sensor cleansers are typically safe for both gasoline and diesel engines. Diesel engines, however, frequently run in dustier or soot-prone settings, necessitating more frequent cleaning. Make sure the cleaner is appropriate for the particular kind of MAF sensor in your engine at all times.
Turbocharged and Direct Injection Engines
Higher airflow volumes and more accurate fuel management are features of cars with direct injection or turbochargers. For these engines, using a specific MAF sensor cleaner is crucial because any residue or damage can seriously impair performance. Carefully cleaning the sensor guarantees that the ECU gets correct information for the best fuel and boost delivery.
Manufacturer Recommendations
Certain MAF cleaning intervals and certified products are offered by certain automakers. Adhering to these guidelines insures proper engine performance, prolongs sensor life, and prevents warranties from being voided. Sensor damage and expensive repairs may result from using harsh or generic cleansers that are not recommended by the manufacturer.
Precautions for Older Vehicles
Sensors in older cars could be more fragile or more difficult to clean. In these situations, handling the component cautiously and using a mild, sensor-safe cleaning are essential. Replacing the sensor could be safer than repeatedly cleaning it if it is seriously polluted or damaged.
MAF Sensor Cleaning vs Replacement: Which Is Better?
Cost Comparison
It is significantly less expensive to clean a mass air flow sensor than to replace it. Depending on the make and model of the car, a new MAF sensor can cost anywhere from $100 to $300, while a bottle of sensor-safe cleaner usually costs between $8 and $15. In addition to saving money, routine cleaning avoids needless sensor purchases brought on by performance problems that could have been fixed with maintenance.
When Cleaning Is Enough
Cleaning with a specialized MAF sensor cleaner is typically adequate if the sensor is lightly soiled or covered with residue. After thorough cleaning, symptoms like rough idle, mild hesitation, or slightly decreased fuel efficiency frequently get better right away. Frequent preventive maintenance can prolong the sensor’s life and preserve engine efficiency, particularly in dusty or urban settings.
When Replacement Is Necessary
Cleaning might not be able to restore proper operation if the MAF sensor is severely contaminated, rusted, or physically destroyed. Replacement is the safer and more dependable choice if there are persistent check engine lights, irregular idle, or poor acceleration even after cleaning. Purchasing a new, OEM-approved sensor in these circumstances guarantees precise airflow readings and completely recovers engine performance.
Preventive Strategy
It is advised to combine regular cleaning with prompt replacement for the best possible engine health. While replacement guarantees continuing dependability after the sensor reaches the end of its service life, cleaning removes buildup before it compromises sensor accuracy. This strategy strikes a compromise between long-term car upkeep, performance, and cost.
Frequently Asked Questions (FAQ) About Mass Air Flow Sensor Cleaner
Can a dirty MAF sensor cause a car to stall?
Yes, the ECU may get inaccurate airflow data from a dirty MAF sensor, which could result in incorrect fuel delivery. This frequently causes the engine to stall, particularly while it is idle or performing low-speed maneuvers. If the sensor is not broken, cleaning it usually fixes these problems.
Will cleaning the MAF sensor clear the check engine light?
Yes, in a lot of situations. Cleaning the sensor and letting it dry will restore accurate airflow readings if a MAF-related error code (such as P0100–P0104) causes the check engine light. On the other hand, if the sensor is defective or damaged, the light can continue, signifying that it needs to be replaced.
Can I drive with a dirty mass air flow sensor?
Technically, yes, but it is not recommended. A dirty sensor can cause poor engine performance, reduced fuel efficiency, and increased emissions. Prolonged driving with a contaminated sensor may also strain other components like spark plugs and the catalytic converter.
How long does MAF sensor cleaner take to dry?
The majority of specialized cleaners evaporate in ten to fifteen minutes. To prevent erroneous readings or electrical problems, make sure the sensor is totally dry before replacing it.
Is MAF cleaner the same as throttle body cleaner?
No. although both are made for engine maintenance, throttle body cleaner is used to remove carbon buildup from throttle plates, while MAF cleaner is specifically made for sensitive sensor components. A MAF sensor may sustain harm if the incorrect cleaning is used on it.
How often should I clean my MAF sensor?
Most cars can be cleaned every 15,000 to 30,000 miles. To maintain optimal performance, more regular cleaning may be required in dusty or off-road conditions.
Expert Maintenance Tips to Keep Your MAF Sensor Clean
Replace the Air Filter Regularly
The MAF sensor is shielded from dust, dirt, and debris by a clean air filter. If you travel in dusty or polluted areas, replace it more frequently or adhere to the manufacturer’s suggested timetable. The sensor’s accuracy may be lowered by contamination from an over-oiled or clogged air filter.
Avoid Over-Oiled Air Filters
To increase filtration, certain aftermarket air filters are extensively oiled. The MAF sensor may become coated with too much oil, leading to erroneous airflow readings. If you utilize oiled filters, use the filter alternatives suggested by the maker of your car or apply simply a thin layer.
Inspect the Intake System for Leaks
Unfiltered air might reach the engine through leaks in the air intake system, bringing pollutants and dust straight to the sensor. Make that the intake path is tight and leak-free by routinely inspecting hoses, clamps, and connections.
Follow Manufacturer Service Schedules
MAF sensor cleaning and inspection are scheduled at predetermined intervals by car manufacturers. Following these schedules preserves engine efficiency, avoids drivability problems, and helps maintain correct sensor readings.
Handle the Sensor with Care
Use caution when removing or cleaning the MAF sensor. Steer clear of using harsh chemicals, twisting wires, and touching the sensor element. Proper handling guarantees dependable long-term performance and lowers the chance of damage.
Keep the Engine Bay Clean
The sensor may eventually become contaminated by dirt, oil residue, and dust in the engine bay. Cleaning the area surrounding the MAF sensor and air intake system on a regular basis can reduce the chance of contamination and increase the sensor’s lifespan.
Conclusion
An easy-to-use yet incredibly powerful tool for preserving engine performance, fuel economy, and sensor longevity is a mass air flow (MAF) sensor cleaning. Frequent cleaning can save you money on needless sensor repairs, guarantee accurate airflow measurements, and avoid drivability problems.
You may prolong the general health of your engine and maintain your MAF sensor’s best performance by using the appropriate cleaning methods, products, and manufacturer recommendations. MAF sensor cleaning is a crucial component of any vehicle care regimen when combined with preventive maintenance and cautious handling.
Although they may appear to be little, unimportant parts, radiator hose clamps are essential to the efficiency and security of a car’s cooling system. By firmly attaching radiator hoses to engine connections, these clamps guarantee that coolant flows effectively without leaks, pressure loss, or system failure. Coolant leaks, engine overheating, and expensive mechanical damage can occur when radiator hose clamps malfunction or are placed incorrectly.
Worn or improperly sized radiator hose clamps are one of the most frequent but often disregarded causes of cooling system issues in actual vehicle maintenance and repair.
For long-term engine health, clamps must be properly chosen and maintained because exposure to intense heat, vibration, pressure variations, and corrosive coolant can degrade them over time. Knowing how radiator hose clamps operate is essential whether you are a professional technician, an auto enthusiast, or a car owner doing routine maintenance.
Everything you need to know about radiator hose clamps is covered in this guide, including the various kinds that are available, the materials that are used, sizing considerations, proper installation methods, and typical issues to be aware of.
This article is intended to assist you in making well-informed decisions that enhance performance, safety, and dependability by drawing on real-world automotive expertise and industry best practices. By the time you’re done, you’ll see why picking the appropriate radiator hose clamp is just as crucial as picking the appropriate hose.
How Do Radiator Hose Clamps Function in a Cooling System?
Radiator hose clamps function by creating a tight, uniform seal between a radiator hose and the metal or plastic fitting it connects to, such as the radiator inlet, thermostat housing, or engine coolant outlet. This seal is essential for maintaining proper coolant pressure and preventing leaks within the engine’s cooling system. Without adequate clamping force, coolant can escape under pressure, reducing cooling efficiency and increasing the risk of engine overheating.
A tightened radiator hose clamp compresses the rubber against the fitting’s barb or flange by applying circumferential pressure around the hose. A leak-proof seal that can tolerate extreme temperatures, pressure changes, and continuous engine vibration is created by this compression. Even a small decrease of clamping tension can create obvious leaks or coolant seepage because modern cooling systems run under pressured settings, frequently between 13 and 16 PSI or greater.
The performance of radiator hose clamps is significantly impacted by temperature variations. Rubber hoses expand when the engine heats up and shrink when it cools. Some clamp designs, like spring or constant-tension hose clamps, are designed to automatically adapt to these variations, sustaining steady pressure over time. Traditional worm gear clamps, on the other hand, must be manually tightened and may become loose as hoses get smaller or older.
Radiator hose clamps are continuously stressed by vibration and engine movement. Clamp fatigue is more common in cars that are driven on bumpy roads or frequently stop and go. Because of this, manufacturers carefully choose clamp types and materials that strike a balance between corrosion resistance, strength, and flexibility. Vehicle owners and technicians may choose the best clamp for long-term dependability and see early warning signs of failure by knowing how radiator hose clamps function within the cooling system.
Radiator hose clamps come in a variety of forms, each designed to withstand particular vehicle applications, temperature fluctuations, and pressure levels. To guarantee a tight seal, stop coolant leaks, and preserve long-term dependability, selecting the right kind of radiator hose clamp is essential. Professional mechanics and automakers choose clamp types based on their performance in real-world scenarios, flexibility, and durability. The most popular kinds of radiator hose clamps used in car cooling systems are listed below.
Worm Gear Radiator Hose Clamps
The most popular and recognized kind of radiator hose clamp is the worm gear clamp. They have a metal band with a threaded screw mechanism that, when the screw is cranked, tightens the clamp. Worm gear clamps are useful for both professional repairs and do-it-yourself maintenance because of their accurate adjustment capability.
Advantages:
Adjustable to a wide range of hose sizes
Easy to install and remove with basic tools
Widely available and cost-effective
Disadvantages:
Can loosen over time due to heat cycling
Risk of hose damage if over-tightened
Less effective at maintaining constant pressure
When installed correctly, worm gear radiator hose clamps work best for low- to moderate-pressure cooling systems and conventional passenger cars.
Spring Radiator Hose Clamps
Manufacturers frequently employ spring radiator hose clamps as original equipment (OEM) because they are made to keep the tension constant while the hoses expand and contract in response to temperature fluctuations. Usually, special pliers are used to install these clamps, compressing the clamp as it is being placed.
Advantages:
Automatically adjusts to temperature fluctuations
Maintains consistent sealing pressure
Reduces risk of leaks over time
Disadvantages:
Requires special tools for installation
Less adjustable than worm gear clamps
Can be difficult to reuse after removal
Spring radiator hose clamps are frequently found on contemporary cars and are preferred in situations where long-term performance is crucial due to their dependability.
T-Bolt Radiator Hose Clamps
T-bolt hose clamps are robust radiator hose clamps made for high-performance, high-pressure applications. To apply uniform clamping force throughout the hose, they employ a bolt and nut system.
Advantages:
Extremely strong and durable
Provides uniform pressure distribution
Ideal for turbocharged and performance engines
Disadvantages:
More expensive than standard clamps
Requires precise sizing
Overkill for standard cooling systems
Constant Tension Radiator Hose Clamps
The purpose of constant tension hose clamps is to keep the pressure constant for the duration of the hose. They lessen the need for retightening by compensating for temperature changes, vibration, and material deterioration.
Advantages:
Self-adjusting clamping force
Minimizes maintenance
Excellent leak prevention
Disadvantages:
Higher cost
Limited availability compared to standard clamps
These clamps are becoming more and more common in contemporary car designs where low maintenance and dependability are top concerns.
Wire and Ear Hose Clamps
Ear clamps and wire clamps are commonly employed in low-pressure or specialized applications. Crimped into position, ear clamps offer a long-lasting, impenetrable seal.
Advantages:
Lightweight and compact
Clean installation appearance
Disadvantages:
Not reusable
Requires special crimping tools
Limited adjustability
Unless the manufacturer specifies otherwise, these clamps are often not advised for high-temperature radiator applications.
Choosing the Right Type of Radiator Hose Clamp
The type of vehicle, cooling system pressure, hose material, and operating circumstances are all important considerations when choosing a radiator hose clamp. Expert mechanics frequently place more value on clamp designs that offer steady pressure and long-term durability than they do on installation simplicity.
Vehicle owners can make well-informed judgments that lower maintenance problems and increase cooling system dependability by being aware of the variations among radiator hose clamp types.
Step-by-Step Guide to Installing Radiator Hose Clamps Correctly
In order to minimize coolant leaks, maintain system pressure, and prevent premature hose or clamp failure, radiator hose clamps must be installed correctly. When installed or tightened incorrectly, even high-quality radiator hose clamps can lead to issues. Professional automobile technicians and skilled do-it-yourself mechanics follow best practices, which are reflected in this detailed handbook.
Tools and Materials Needed
Before starting, gather the following tools to ensure a smooth and safe installation:
Flathead screwdriver or nut driver (for worm gear clamps)
Hose clamp pliers (for spring or constant tension clamps)
New radiator hose clamp (correct size and type)
Clean shop rag
Safety gloves and eye protection
Pro Tip: To guarantee adequate sealing and long-term dependability, radiator hose clamps should always be changed when installing a new hose.
Step 1: Allow the Engine to Cool Completely
When the engine is hot, never try to fix radiator hoses. Cooling systems run under pressure, and if a clamp is removed from a heated system, hot coolant may shoot out and cause severe burns.
Turn off the engine and allow it to cool for at least 30–60 minutes
Slowly remove the radiator cap only if necessary and only when cool
Step 2: Position the Radiator Hose Correctly
Make sure the radiator hose is completely placed over the barb or fitting. To produce a secure sealing surface, the hose should slide past the fitting’s raised lip or bead.
Check for cracks, swelling, or hardened rubber
Clean the hose and fitting with a rag to remove debris
Improper hose positioning is a common cause of coolant leaks even when the clamp is tight.
Step 3: Place the Radiator Hose Clamp in the Correct Location
Place the radiator hose clamp immediately beneath the raised bead of the fitting, about ¼ inch (6–8 mm) from the end of the hose.
Avoid placing the clamp directly on the hose edge
Ensure the clamp sits evenly around the hose
Correct placement ensures even pressure distribution and prevents hose slippage.
Step 4: Tighten the Radiator Hose Clamp Properly
As you gradually tighten the clamp, make sure it stays centered and straight. Compressing the hose sufficiently to seal it without causing damage is the aim.
For worm gear clamps, tighten until snug—do not overtighten
For spring clamps, release tension slowly to allow proper seating
Avoid crushing or deforming the hose
Expert Insight: One of the most frequent installation errors is overtightening, which can result in hose failure or limited coolant flow.
Step 5: Inspect the Installation
Once the clamp is installed, perform a visual and physical inspection:
Ensure the clamp is not tilted or uneven
Gently tug the hose to confirm it is secure
Check for gaps between the hose and fitting
A properly installed radiator hose clamp should feel firm without cutting into the hose.
Step 6: Test the Cooling System
After installation, start the engine and allow it to reach normal operating temperature.
Inspect the clamp area for leaks
Check again after the engine cools down
Retighten slightly if necessary (worm gear clamps only)
Heat cycling can cause hoses to settle, making a final inspection critical.
Common Installation Mistakes to Avoid
Installing clamps on damaged or hardened hoses
Using the wrong clamp size
Overtightening worm gear clamps
Reusing weakened spring clamps
Preventing these errors greatly increases cooling system dependability and lowers the need for future maintenance.
Common Radiator Hose Clamp Problems and How to Fix Them
Heat, pressure, vibration, and natural wear can all cause issues over time, even with high-quality radiator hose clamps. Early detection of these problems can help avoid costly repairs, engine overheating, and coolant loss. The most typical radiator hose clamp issues are listed here, along with efficient solutions based on actual vehicle maintenance expertise.
Coolant Leaks Around the Hose Connection
The most typical indication of radiator hose clamp failure is coolant leaks. Dried coolant residue, a pleasant odor, or obvious dripping near hose connectors are common signs of leaks.
Causes:
Loose or improperly positioned clamp
Worn or hardened radiator hose
Incorrect clamp size
Solutions:
Reposition the clamp behind the hose bead
Tighten the clamp gradually and evenly
Replace the clamp and hose if signs of aging are present
Over-Tightened Radiator Hose Clamps
A common error is overtightening, particularly with worm gear hose clamps. Overtightening can cause fittings to distort or cut into the hose.
Symptoms:
Hose bulging or cracking near the clamp
Persistent leaks despite tightness
Restricted coolant flow
How to Fix It:
Replace the damaged hose immediately
Install a new clamp and tighten to a snug, not forced, fit
Consider constant tension clamps to prevent future issues
Corrosion and Rust on Hose Clamps
The continuous exposure of radiator hose clamps to coolant and moisture can cause corrosion, particularly when the materials are of poor quality.
Warning Signs:
Rust buildup on clamp bands or screws
Difficulty tightening or loosening the clamp
Reduced clamping force
Prevention and Fix:
Replace corroded clamps with stainless steel versions
Avoid mixing incompatible metals
Inspect clamps during routine maintenance
Clamp Slippage and Loss of Tension
Hoses may slip off fittings due to clamps that lose tension, particularly when there is a lot of pressure or vibration.
Common Causes:
Improper clamp type for the application
Heat cycling causing material fatigue
Reused spring clamps
Solutions:
Upgrade to constant tension or spring clamps
Ensure proper sizing and fitment
Replace clamps during hose service
Incorrect Clamp Size or Type
Using the wrong clamp size or type can lead to repeated failures, even if the clamp appears secure initially.
Indicators:
Uneven pressure around the hose
Clamp bottoming out before sealing
Frequent need for retightening
Best Practice:
Measure hose diameter accurately
Match clamp design to system pressure and temperature
Follow OEM recommendations whenever possible
When to Seek Professional Help
There could be underlying problems like warped fittings, broken housings, or cooling system overpressure if coolant leaks continue even after proper clamp installation. To stop additional engine damage in these situations, a professional diagnosis is advised.
How to Choose the Right Radiator Hose Clamp Size
Just as crucial as selecting the appropriate clamp type is selecting the appropriate radiator hose clamp size. Even when installed correctly, an incorrectly sized clamp might result in hose damage, coolant leaks, or total clamp failure. Expert mechanics stress that precise sizing is essential to the dependability of cooling systems.
Measure the Radiator Hose Diameter Correctly
When the hose is put on the fitting, measure its outside diameter to determine the appropriate clamp size:
Use a digital caliper or measuring tape
Measure at the point where the clamp will sit
Account for hose thickness and fitting bead
Avoid estimating sizes, as even small discrepancies can prevent proper sealing.
Understand Clamp Size Ranges
The majority of radiator hose clamps can be adjusted within a certain size range. Instead of selecting a clamp at the extremes of the adjustment range, always choose one where your measured hose diameter is close to the middle.
Too small: clamp won’t fit properly
Too large: clamp may bottom out before sealing
This ensures even pressure and long-term performance.
Adjustable vs Fixed-Size Clamps
Adjustable clamps (worm gear) offer flexibility but require correct torque
Fixed-size clamps (spring or constant tension) rely on precise sizing for optimal performance
OEM systems often use fixed-size clamps for consistent pressure control.
Common Sizing Mistakes to Avoid
Using universal clamps for all hoses
Reusing stretched spring clamps
Ignoring hose swelling due to age or heat
Proper sizing reduces the risk of leaks and repeat repairs.
Radiator Hose Clamp Materials Explained
A radiator hose clamp’s effectiveness in high temperatures, corrosion resistance, and longevity are all directly impacted by its material. Long-term dependability depends on the choice of material, particularly in challenging operating conditions.
Stainless Steel Radiator Hose Clamps
Stainless steel clamps are widely regarded as the best option for most vehicles.
Benefits:
Excellent corrosion resistance
Long service life
Ideal for high-temperature environments
These clamps are recommended for daily drivers, performance vehicles, and humid climates.
Carbon Steel Hose Clamps
Carbon steel clamps are commonly used in budget applications and older vehicles.
Pros:
Affordable
Strong initial clamping force
Cons:
Susceptible to rust
Shorter lifespan
They require regular inspection and replacement.
Plastic and Nylon Hose Clamps
Plastic or nylon clamps are rarely suitable for radiator applications.
Limitations:
Poor heat resistance
Low pressure tolerance
They are typically used only in low-temperature or auxiliary systems.
Choosing the Best Material for Your Application
Stainless steel constant tension clamps provide the optimum combination of performance, safety, and durability for the majority of automobile cooling systems. The manufacturer’s guidelines and the operating conditions of the vehicle should always be taken into consideration while choosing materials.
When Should You Replace Radiator Hose Clamps?
Radiator hose clamps endure the same wear and tear as hoses themselves, although they are frequently disregarded during routine maintenance. It is possible to avoid unexpected cooling system failure by knowing when to replace them.
Signs That a Radiator Hose Clamp Needs Replacement
Visible rust or corrosion
Loss of tension or slippage
Coolant residue around connections
Difficulty tightening or loosening
Any of these signs indicate reduced clamping effectiveness.
Replacement During Routine Maintenance
Best practice is to replace radiator hose clamps whenever:
A radiator hose is replaced
Major cooling system components are serviced
The vehicle reaches high mileage
This preventative approach minimizes future leaks and breakdowns.
How Long Do Radiator Hose Clamps Last?
Under normal conditions:
Stainless steel clamps: 5–10 years or more
Carbon steel clamps: 2–5 years
Environmental factors and driving conditions can shorten lifespan.
Frequently Asked Questions About Radiator Hose Clamps
What Are Radiator Hose Clamps Used For?
In order to create a tight, leak-proof seal that permits coolant to flow under pressure, radiator hose clamps are used to fasten radiator hoses to engine and radiator fittings. They play a vital role in preserving the effectiveness of the cooling system, stopping coolant leaks, and guaranteeing that the engine runs at a safe temperature.
Can a Bad Radiator Hose Clamp Cause Overheating?
Yes, a loose or malfunctioning radiator hose clamp can lead to engine overheating by letting coolant escape from hose connections, which lowers cooling effectiveness and adds air to the system. If they are not fixed right away, even tiny leaks can cause major engine damage and interfere with appropriate temperature regulation.
How Tight Should a Radiator Hose Clamp Be?
A radiator hose clamp should be tightened just enough to keep the rubber from being sliced or distorted while still sealing the hose. Because overtightening might harm the hose and result in future leaks, the hose should not rotate on the fitting, and the clamp should rest evenly while compressing the line slightly.
Are Spring Radiator Hose Clamps Better Than Worm Gear Clamps?
For modern cars, spring radiator hose clamps are frequently preferable because they reduce the possibility of leaks by maintaining constant tension while hoses expand and contract in response to temperature variations. Although worm gear clamps are simpler to install and set, improper maintenance may cause them to loosen over time.
Can You Reuse Radiator Hose Clamps?
While spring and constant tension clamps are usually best replaced after removal, worm gear radiator hose clamps can be reused provided they are in good shape and free of corrosion or stripped threads. Optimal sealing and long-term dependability are ensured by replacing clamps during hose installation.
What Size Radiator Hose Clamp Do I Need?
Once the hose is mounted on the fitting, measure its outside diameter to establish the appropriate radiator hose clamp size. Then, choose a clamp whose adjustment range positions that measurement close to the middle. Coolant leaks and unequal pressure are avoided by using the proper size.
How Often Should Radiator Hose Clamps Be Replaced?
Every time a radiator hose is replaced, or if there are indications of corrosion, loss of tension, or leaking, the clamps should be changed. Even though stainless steel clamps have a long lifespan, it is advised to regularly inspect them as part of cooling system maintenance.
What Are the Signs of a Failing Radiator Hose Clamp?
Signs of a failing radiator hose clamp include visible coolant residue near hose connections, rust or corrosion on the clamp, hose slippage, or the need for frequent retightening. Addressing these signs early helps prevent sudden coolant loss and overheating.
Are Stainless Steel Radiator Hose Clamps Worth It?
Because of their exceptional longevity, resistance to corrosion, and capacity to tolerate high temperatures and pressure, stainless steel radiator hose clamps are well worth the investment. They are advised for the majority of vehicle cooling system applications and offer long-term dependability.
Can I Use Universal Hose Clamps for Radiator Hoses?
Although radiator-specific hose clamps are typically preferable since they are made to withstand high temperatures, pressure variations, and vibration encountered in cooling systems, universal hose clamps can be used in certain radiator applications. Performance and safety are increased when the right kind of clamp is used.
Do Radiator Hose Clamps Need to Be Retightened?
While spring and constant tension clamps usually don’t need to be retightened, worm gear radiator hose clamps can need to be after the first heat cycle when the hose settles. After installation, a brief check helps guarantee a tight seal.
Should I Replace Radiator Hose Clamps When Replacing Coolant?
When changing coolant, it is advised to check radiator hose clamps and replace any that exhibit wear, corrosion, or poor fit. By doing this during coolant service, future leaks can be avoided and total maintenance expenses can be decreased.
Conclusion
Despite their tiny size, radiator hose clamps are essential to the upkeep of a dependable and effective engine cooling system. Coolant leaks, overheating, and expensive engine damage can be avoided by selecting the proper clamp type, size, and material and installing it appropriately. Consistent cooling performance and long-term vehicle dependability are ensured by routine inspection and prompt repair of radiator hose clamps. Vehicle owners and technicians can safeguard engine health and prevent needless repairs by comprehending how radiator hose clamps operate and adhering to recommended maintenance procedures.
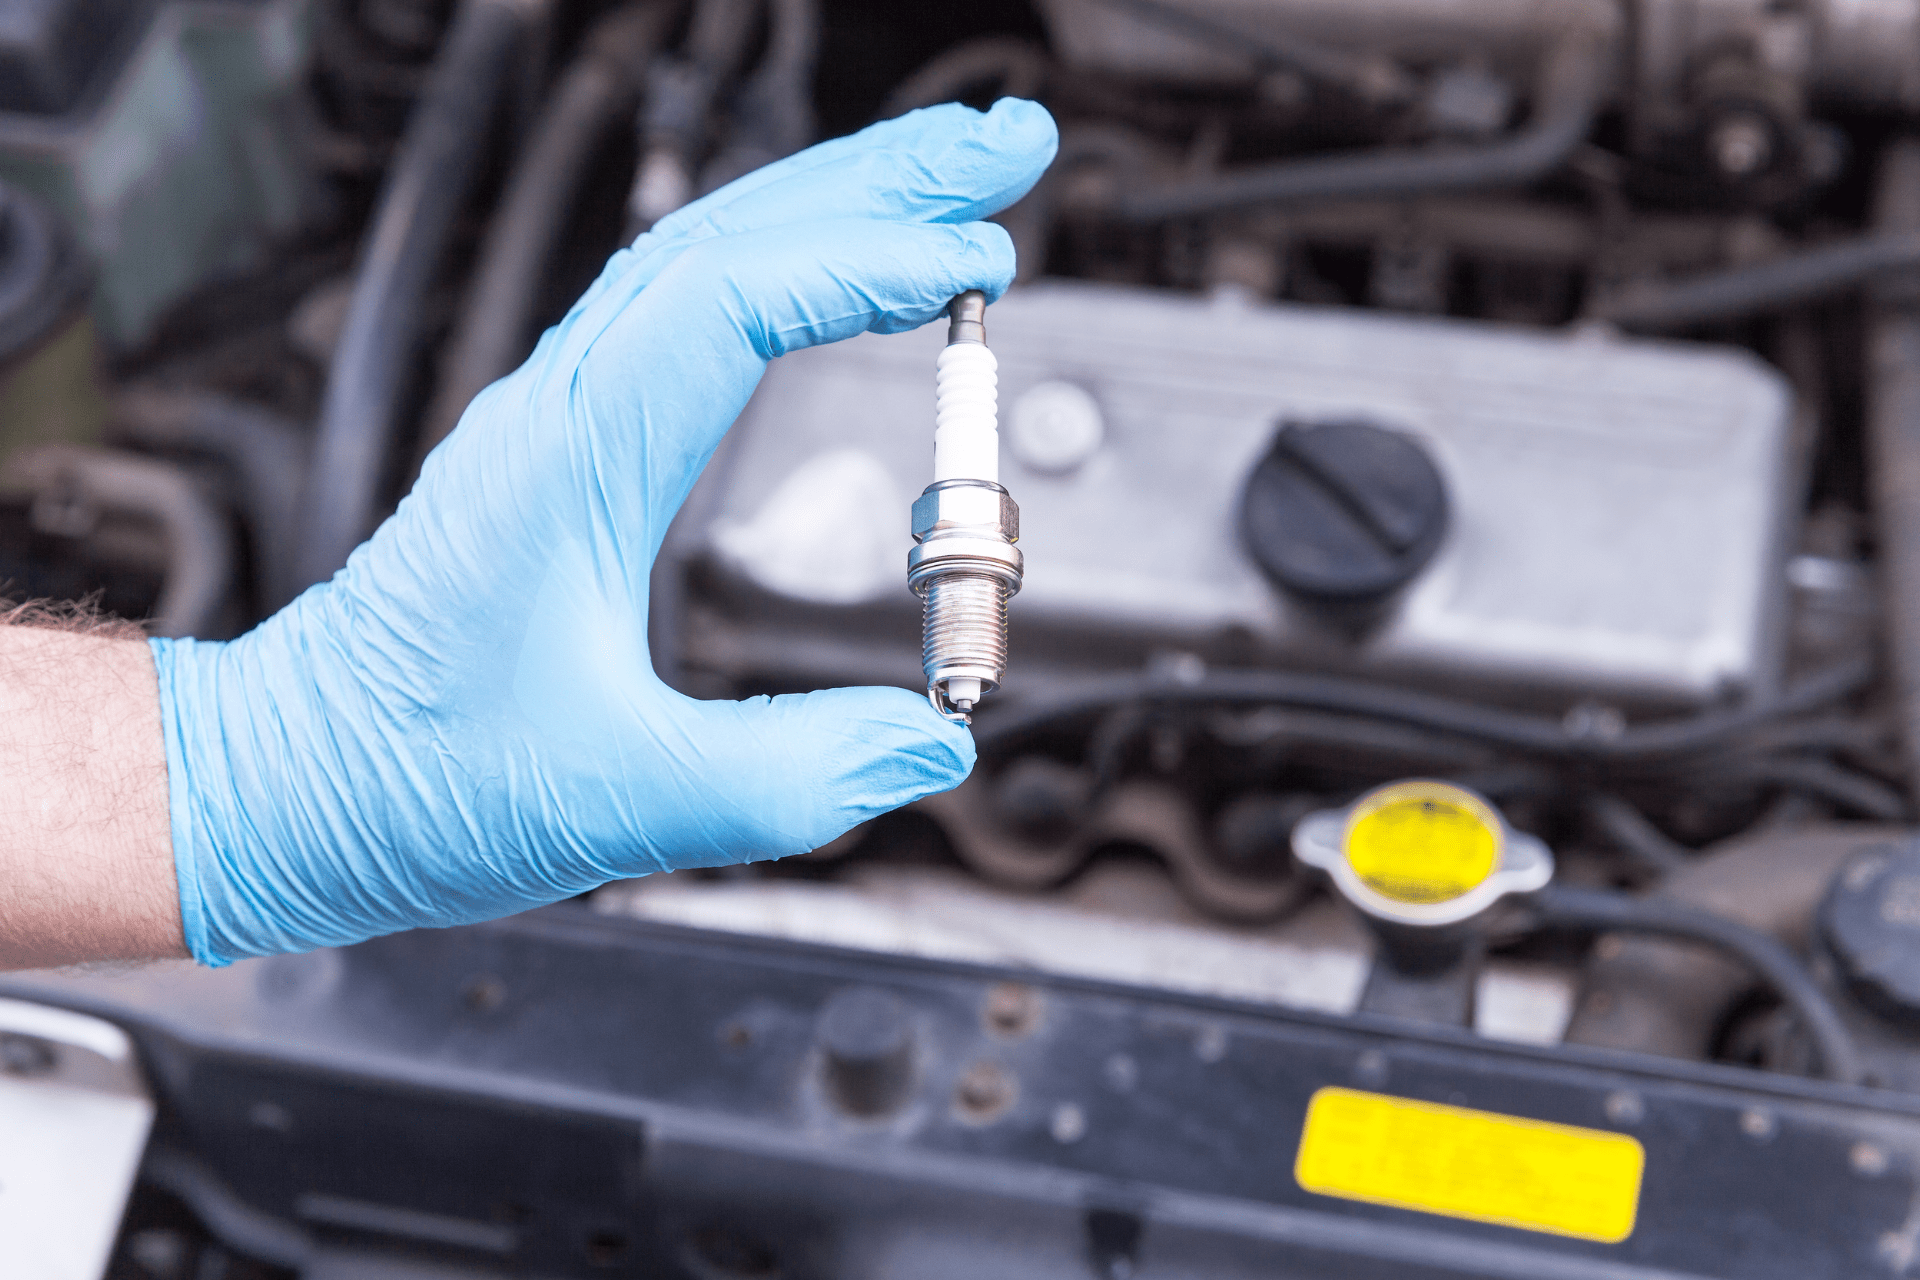


")


")


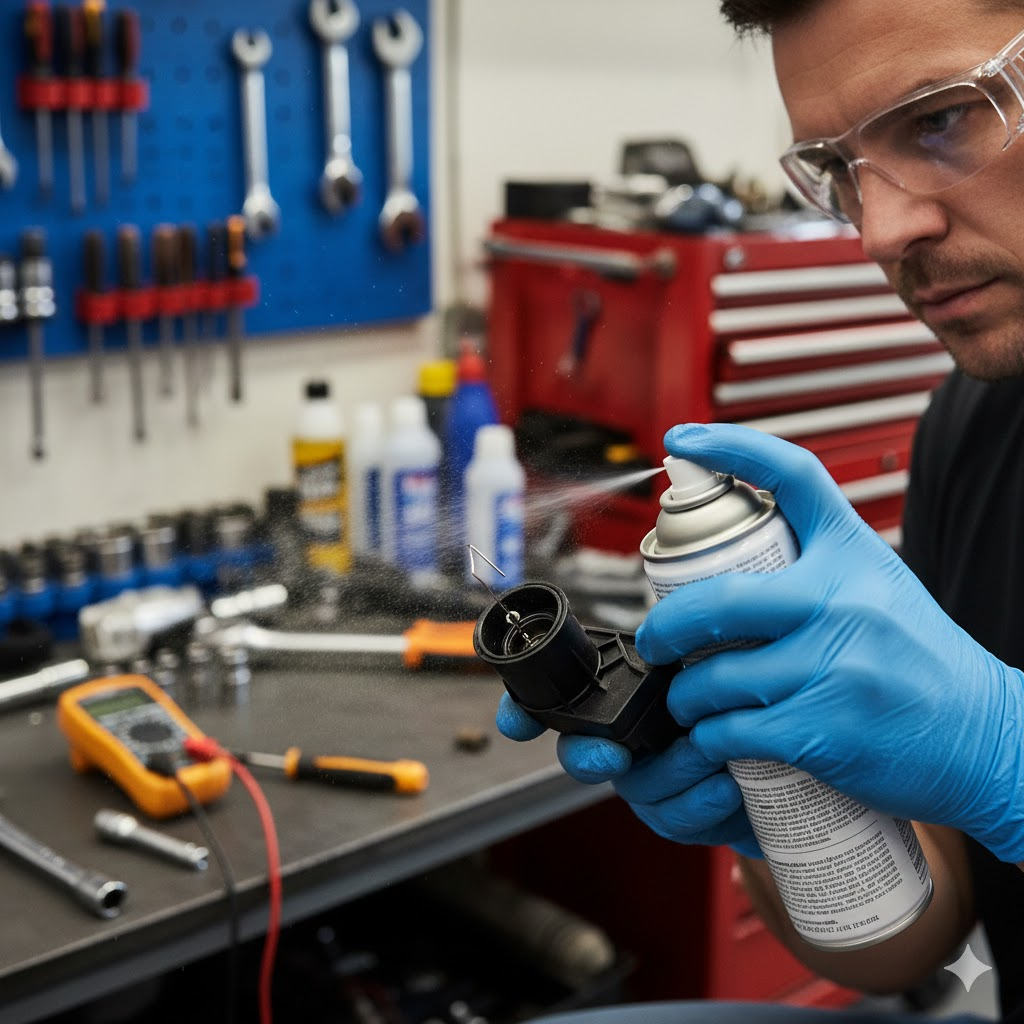


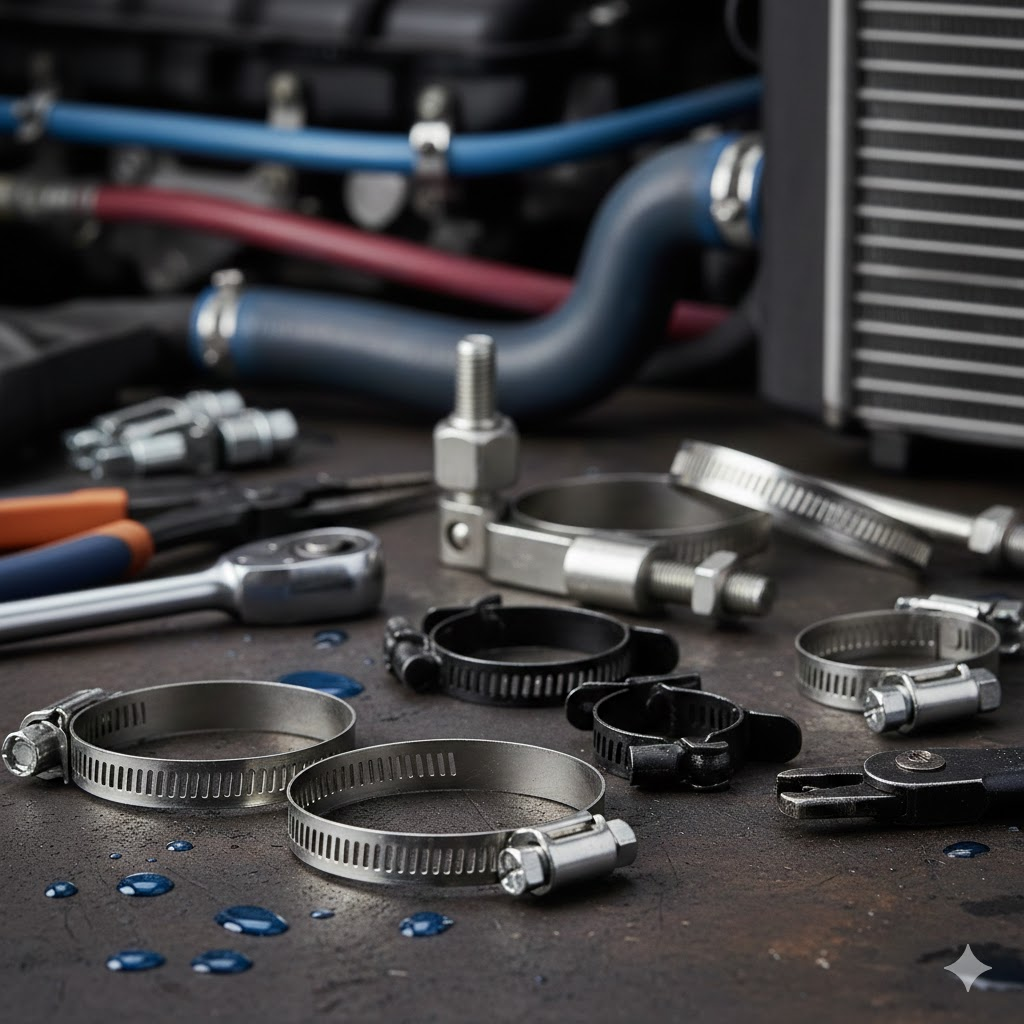
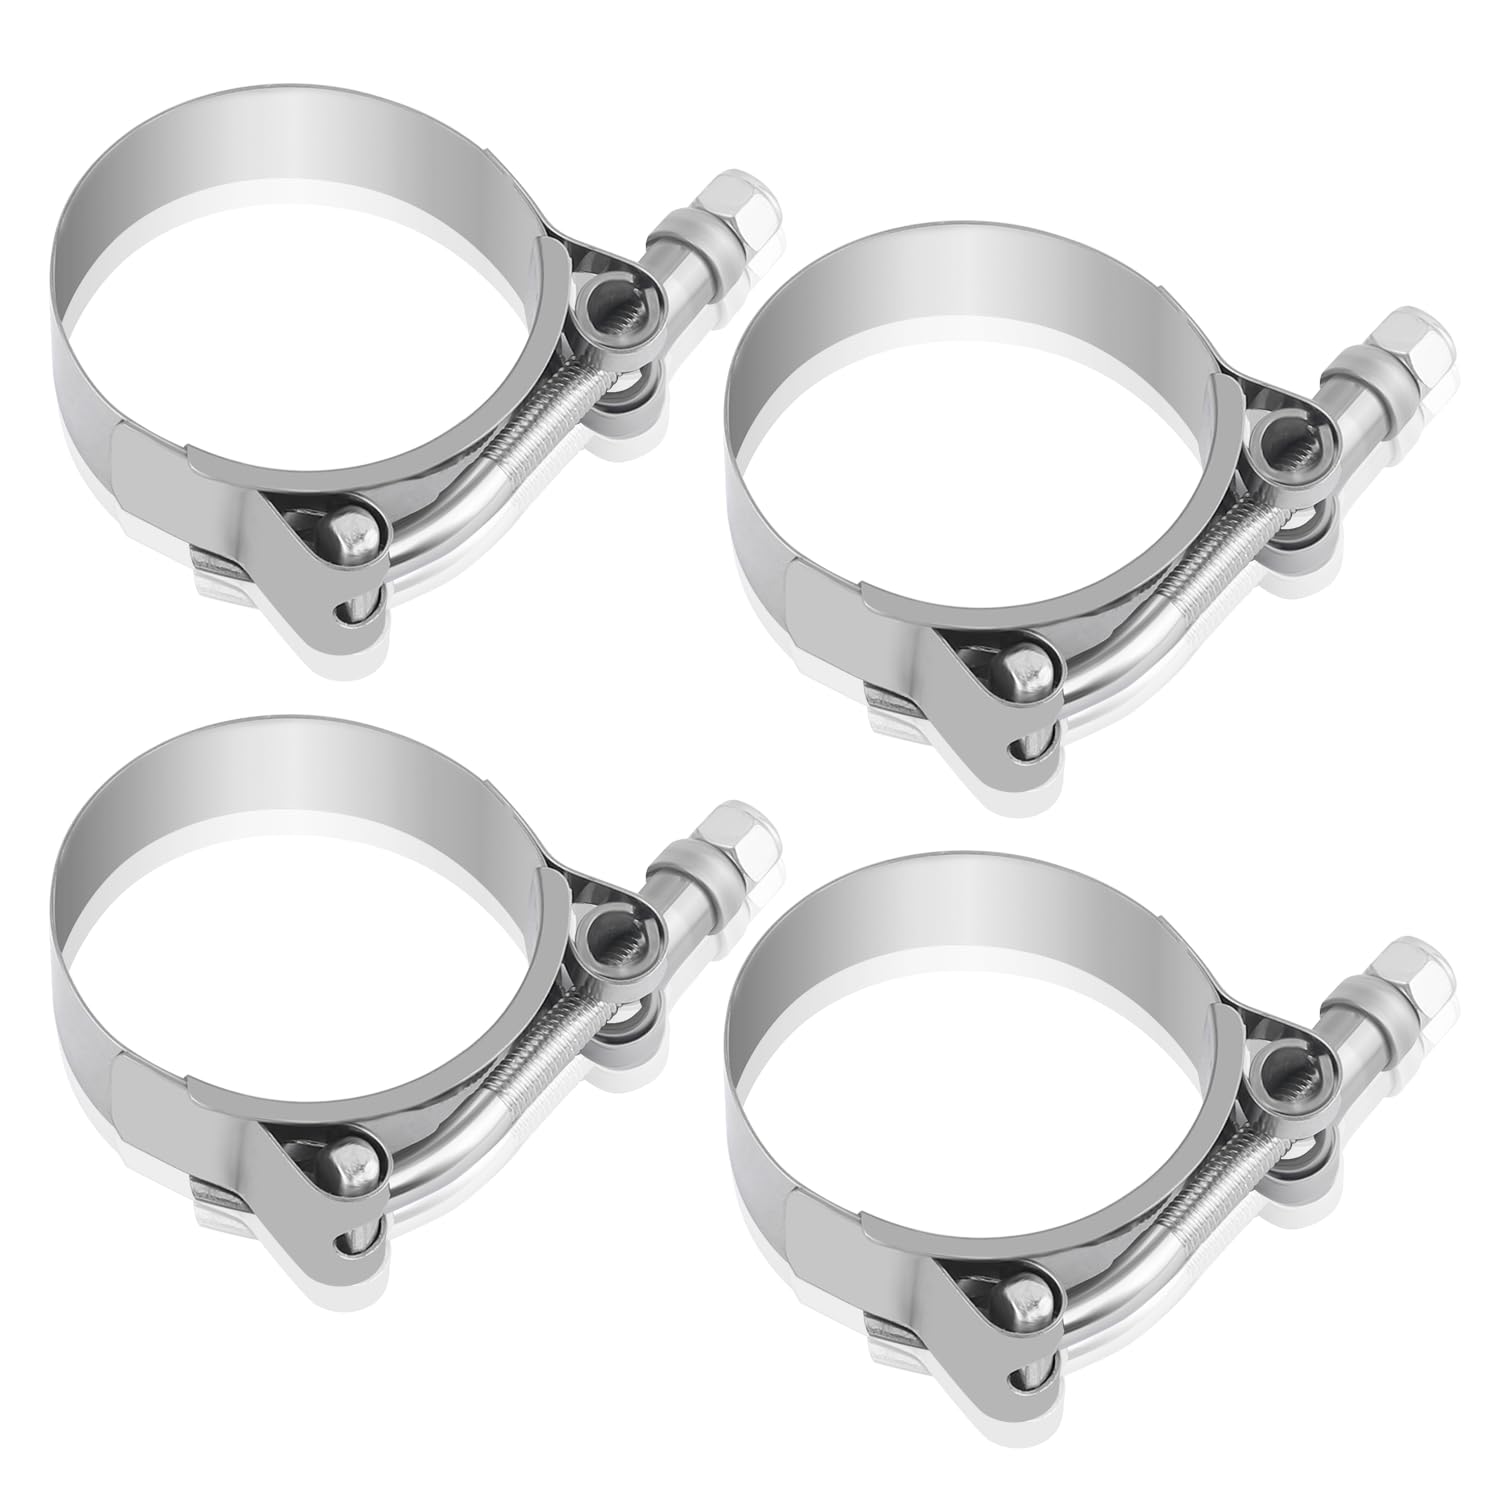

 Car Maintenance Tips5 months ago
 Car Maintenance Tips4 months ago
 Engine Care6 months ago
 Car Maintenance Tips6 months ago
 Car Maintenance Tips6 months ago
 Electric Vehicles5 months ago
 Car Maintenance Tips5 months ago
 Car Maintenance Tips5 months ago